
Wrapping a gift box with a beautiful ribbon—often referred to as a pita wrap—elevates a simple present into a memorable gesture. Achieving a crisp, professional finish does not require advanced design skills, but it does demand a systematic approach to measuring, tensioning, and securing your materials. In warm, humid tropical climates like the Philippines, selecting the right adhesive and ribbon type is especially important to ensure your gift remains pristine from the moment it is wrapped until it is opened. By mastering a few fundamental techniques, you can create stunning gift presentations while minimizing material waste.
Tools and Materials for Ribbon Wrapping
Before beginning your wrapping project, gathering the correct stationery and wrapping supplies is essential for achieving a clean, professional look. The type of ribbon you select plays a significant role in how easily it handles and how well it holds its shape. Satin ribbon is highly popular for its smooth, glossy finish, but its slick texture can make it prone to slipping during the wrapping process. Grosgrain ribbon features a ribbed texture that provides excellent friction, making it highly reliable for holding tight knots, especially in humid conditions where other materials might lose their grip. Wired ribbon contains thin, flexible wires along its edges, which is ideal for creating large, structured bows that will not sag or lose their volume over time. Always check the product label for width and texture suitability to ensure the ribbon matches the scale of your gift box.
In addition to the ribbon itself, you will need a few essential tools to complete the task cleanly. A pair of sharp fabric scissors is critical; using dull household scissors can chew through the delicate fibers of the ribbon, leaving unsightly, frayed edges. You will also need double-sided tape or adhesive glue dots to secure the ribbon discreetly beneath the folds. A clean, flat working surface, such as a large table or desk, provides the stability needed to keep your wrapping paper and ribbon aligned.
Products mentioned in this guide
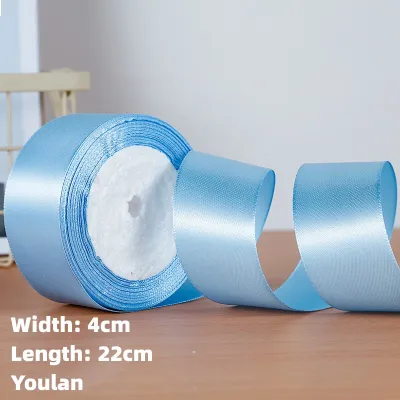
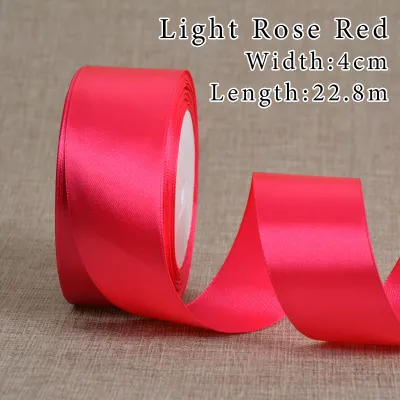
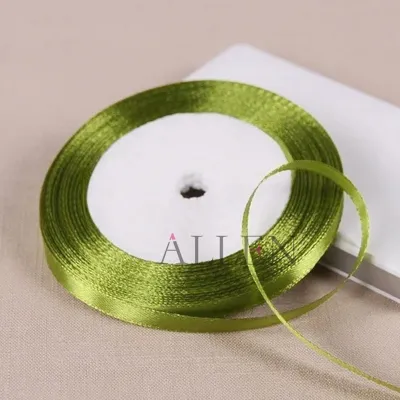
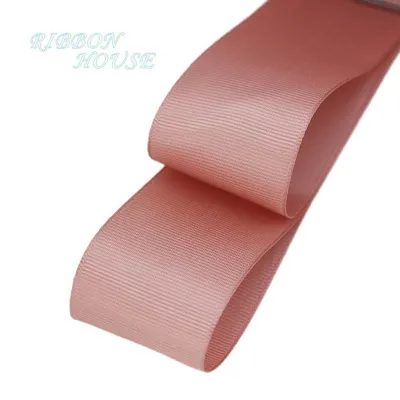
Prices are valid at publication and may change. Please refer to the product page for the latest price.
Safety and material care should always be prioritized during this process. Keep sharp fabric scissors closed and out of reach of children when they are not in active use. Additionally, before applying any adhesive to your gift box, inspect the surface finish of the packaging. Delicate finishes, such as handmade textured papers, metallic foils, or matte-coated cardboards, can easily tear or peel if you attempt to reposition double-sided tape. Testing a small piece of tape on an inconspicuous area of the box first is an excellent way to verify compatibility.
How to Measure and Cut Ribbon Without Wasting Material
One of the most common mistakes beginners make is cutting a random length of ribbon, which often results in either a piece that is too short to tie a bow or a large amount of wasted material. To prevent this, you can use a simple, reliable formula to calculate the exact amount of ribbon needed for a standard rectangular or square box. Wrap the ribbon loosely around the length of the box once, then wrap it around the width of the box once. To this combined measurement, add an extra 12 to 18 inches of ribbon. This additional length provides the necessary allowance for crossing the ribbon, tying the central knot, forming the bow loops, and trimming the tails.

For unusually shaped, deep, or oversized boxes, you will need to adjust your measurements accordingly. For a very deep box, the height of the sides must be accounted for multiple times. A good rule of thumb for deep boxes is to wrap the ribbon around the longest perimeter of the box, then add four times the height of the box, plus your standard bow allowance. If you are wrapping an exceptionally large gift, consider using a wider ribbon style to maintain visual balance, as thin ribbons can look disproportionate on large surfaces.
The way you cut your ribbon is just as important as how you measure it. To prevent the woven edges from fraying over time, always cut the ribbon at a sharp 45-degree angle. This diagonal cut reduces the tension on the individual horizontal threads, keeping the end of the ribbon neat and intact. If you are working with highly delicate or loosely woven fabrics that are exceptionally prone to unraveling, using pinking shears can provide a decorative, zig-zag edge that naturally locks the weave in place.
Step-by-Step Guide to Wrapping a Standard Gift Box
Executing a classic cross-ribbon wrap requires patience and a steady hand. Start by laying your measured ribbon completely flat on your clean working surface. Place your gift box face down directly in the center of the ribbon’s length. Placing the box face down ensures that the cleanest, most seamless portion of the ribbon runs across the top face of the gift, while the overlapping intersection and tape remain hidden on the bottom.
Next, bring both ends of the ribbon up over the sides of the box. Cross the two ends over each other at the exact center of the box’s bottom. Twist the ribbon ends 90 degrees at this intersection so they now run perpendicular to their original direction, forming a clean cross shape. To keep this intersection from shifting while you complete the next steps, secure it to the bottom of the box with a small piece of double-sided tape.
Carefully flip the gift box over so it is now sitting right-side up on your workspace. Bring the two remaining ribbon ends up and over the sides of the box toward the top center. As you pull the ribbon ends upward, use your fingers to smooth out any twists or folds along the sides of the box. The ribbon must lie completely flat against the packaging to achieve a professional, high-quality appearance.
Maintaining the correct amount of tension is crucial during this stage. The ribbon should be snug enough to remain securely in place when the gift is handled, but not so tight that it bows or crushes the cardboard edges of your gift box. In tropical climates, cardboard packaging can absorb ambient moisture and soften slightly, making moderate, even tension especially important to prevent structural damage to the box.
Bring the two ribbon ends together at the top center of the box where they meet. Thread one end of the ribbon completely under the flat ribbon loop that is already running horizontally across the top of the box. Pull both ends taut to create a temporary anchor point. This simple tuck locks the tension of the wrap in place, freeing up your hands to focus entirely on tying the final bow without the ribbon slipping loose.
How to Tie a Classic Bow for a Professional Finish
Tying a symmetrical, secure bow is the crowning touch of your gift wrapping. With your ribbon ends anchored at the top center of the box, tie a simple half-knot, similar to the first step of tying a shoe. Press your index finger firmly down on the center of this knot to maintain the tension, then use your other hand to form a neat loop with one of the ribbon tails.
Take the second ribbon tail and wrap it around the base of the first loop you created. Push the middle of this second tail through the opening underneath the intersection to form a second loop. As you pull this loop through, make sure the ribbon does not twist or fold over itself, keeping the smooth, finished side of the ribbon facing outward on both loops.
Gently pull both loops outward to begin tightening the knot. Before pulling the knot completely tight, take a moment to adjust the size of the loops and the length of the remaining tails. For the best visual balance, the loops should be roughly equal in size, and the tails should extend slightly past the edges of the loops without dragging on the table surface.
Once you are satisfied with the proportions, give both loops a firm, final pull to secure the central knot. Ensure that the ribbon material does not wrinkle or bunch up at the center of the knot, as a flat, tight knot is key to a polished look. If the ribbon feels loose, you can gently pull the individual tails to tighten the base before finalizing the loop sizes.
Finish the presentation by trimming the ribbon tails to a professional standard. You can cut them at a clean 45-degree angle, or create a classic V-shape, also known as a swallowtail. To cut a perfect V-shape, fold the end of the ribbon tail in half vertically, then use your sharp fabric scissors to cut diagonally upward from the folded edge to the outer edge. Unfold the ribbon to reveal a perfectly symmetrical, decorative finish.
Troubleshooting Common Ribbon Wrapping Mistakes
Even with careful preparation, mistakes can happen during the ribbon wrapping process. One of the most common issues is discovering a twist in the ribbon after you have already flipped the box over. If this occurs, do not untie the entire wrap. Instead, slide your finger along the underside of the twisted section to locate the source, then gently flip the ribbon over at the nearest corner of the box to flatten it out before securing the top knot.
Another frequent challenge is ribbon slipping off glossy, laminated, or curved gift boxes. Because these surfaces lack texture, satin and organza ribbons can easily slide out of place. To solve this, apply a small dot of double-sided tape or a removable glue dot directly to the corners of the box beneath the ribbon. This provides an invisible anchor that keeps the ribbon perfectly positioned without affecting the overall aesthetic of your wrap.
If you accidentally cut your ribbon too short and find yourself unable to tie a full bow, there is no need to discard the material. You can tie a neat, flat square knot instead, trimming the short tails close to the knot for a modern, minimalist look. Alternatively, you can splice a separate piece of ribbon onto the center knot. Simply tie a basic knot with your short ribbon, then use a separate, smaller piece of ribbon to tie a bow and secure it to the center knot using a glue dot or a small stitch.
Frequently Asked Questions (FAQ)
Can I use double-sided tape on all types of gift boxes?
Double-sided tape is highly effective for securing ribbons, but it is not suitable for every surface. Glossy and standard matte cardboard boxes handle tape well, but delicate materials like handmade bark paper, metallic foil, or velvet-flocked boxes can be easily ruined by adhesives. Always test a tiny piece of tape on an inconspicuous area, such as the inside flap of the box, before applying it to the exterior. If the surface is prone to tearing, rely on tight ribbon tension and secure knots rather than adhesives to keep your wrap in place.
How do I wrap a cylindrical or irregularly shaped gift with ribbon?
Cylindrical items, such as poster tubes or jars, do not accommodate the traditional cross-wrap method easily. Instead, wrap a single band of ribbon around the circumference of the cylinder and secure it with double-sided tape or a tight knot. For highly irregular shapes, you can use wired ribbon to create a gathered or ruffled effect along the curves, as the wire helps the ribbon conform to unusual contours. If you are wrapping a fragile or highly valuable item, always check the manufacturer’s packaging guidelines first to ensure your wrapping method does not compromise the item’s safety.

Community discussion
Share your experience or ask a question. Comments are reviewed before publication.