
Wrapping gifts with a burlap cloth roll brings an organic, tactile elegance to any occasion, offering a refreshing departure from standard glossy wrapping paper. This natural, woven material provides a sturdy and textured base that pairs beautifully with soft or structured ribbon bows, creating a classic rustic aesthetic. Whether you are preparing gifts for a tropical garden wedding, a warm family gathering, or a festive holiday exchange in the Philippines, mastering this wrapping technique ensures your packages look thoughtfully crafted and uniquely personal.
To achieve a polished finish, you must work with the unique characteristics of burlap. Because it is a loosely woven fabric rather than a smooth sheet of paper, it requires specific cutting, folding, and securing methods to prevent fraying and ensure a tight, neat fit. By combining the raw appeal of a burlap cloth roll with the refined structure of a well-crafted bow, you can elevate simple gift boxes into stunning, memorable presentations.
Gather Your Materials and Tools for Rustic Wrapping
Before beginning, gathering the right tools and materials will streamline your workflow and prevent frustration. The foundation of your project is a high-quality burlap cloth roll, which is widely available in various widths on online marketplaces or at local craft supply shops. For the best results, select a tightly woven burlap roll to minimize shedding and provide better coverage for your gift boxes. Choosing the correct width is essential; a 6-inch roll works beautifully for small jewelry boxes or jars, while a 12-inch or wider roll is ideal for standard shirt boxes and larger packages.
Products mentioned in this guide
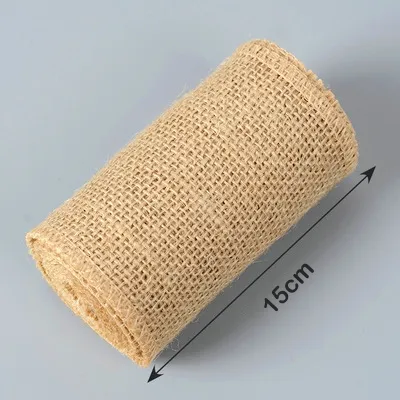
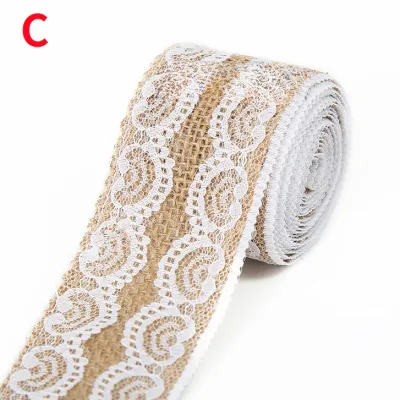
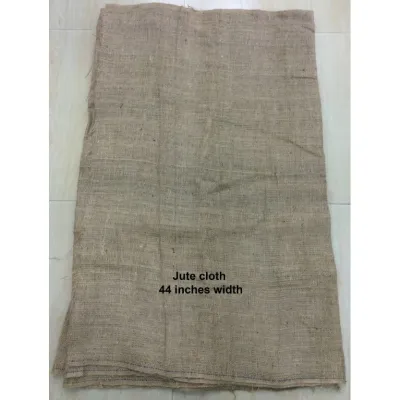
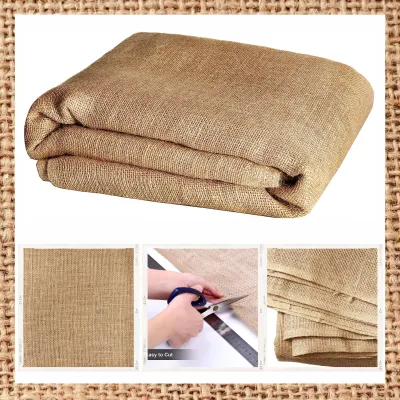
Prices are valid at publication and may change. Please refer to the product page for the latest price.
You will also need a selection of complementary ribbons to create your bows. Wired ribbons are excellent for creating voluminous, structured loops that hold their shape even in humid tropical climates, while soft cotton, linen, or satin ribbons offer a more relaxed, delicate contrast to the coarse burlap texture. Ensure you have a pair of exceptionally sharp fabric scissors, as dull blades will snag the loose fibers of the burlap and cause immediate fraying.
For securing the wrap, standard clear office tape will not suffice due to the porous, uneven surface of the fabric. Instead, prepare heavy-duty double-sided fabric tape, hot glue sticks with a low-temperature glue gun, or strong glue dots. To complete the rustic theme, consider gathering optional decorative accents such as natural jute twine, sturdy kraft paper tags, and dried botanicals like local ferns, dried citrus slices, or small wooden embellishments. Finally, inspect your gift boxes to ensure they are structurally sound and securely taped shut before you begin wrapping them in fabric.
How to Measure, Cut, and Wrap With a Burlap Cloth Roll
Working with a burlap cloth roll requires a slightly different approach than working with traditional wrapping paper. Start by clearing a flat, clean workspace to prevent the fabric from picking up dust or loose debris. Unroll a generous length of the burlap on your table and place your gift box face down on top of the material. Verify that your box is sturdy enough to withstand the tension of tight fabric wrapping without collapsing or warping along the edges.

To measure the correct amount of fabric, pull the burlap up and over the sides of the box until the ends meet and overlap by at least two to three inches. This overlap is crucial because it allows you to fold the raw edges under for a clean, professional seam. For the ends of the box, ensure the fabric extends upward to slightly more than half the depth of the box on each side. Once you have determined the correct dimensions, use your sharp fabric scissors to cut the burlap in a single, continuous motion. Avoid sawing back and forth, as this separates the woven jute fibers and leads to excessive unraveling.
If you notice the cut edges starting to fray immediately, you can apply a quick troubleshooting step. Run a very thin line of clear craft glue or specialized fabric sealant along the raw edges and let it dry for a few minutes before proceeding. Alternatively, you can simply fold the raw cut edge inward by half an inch to hide the loose threads completely inside the wrap.
To wrap the box, pull the long sides of the burlap tightly over the center of the package. Because standard tape will not stick to the textured surface, apply a strip of heavy-duty double-sided fabric tape or a few dots of low-temperature hot glue along the overlapping seam. Press the fabric down firmly for several seconds to allow the adhesive to bond with the porous fibers. When using a hot glue gun, exercise caution to avoid finger burns, as the hot adhesive can easily seep through the open weave of the burlap fabric.
Next, address the ends of the box. Fold the top flap of the burlap down against the side of the box, pressing it flat to create neat, diagonal creases on the left and right sides. Fold these side flaps inward toward the center, keeping the fabric as taut as possible. Finally, fold the bottom flap upward to cover the side folds. Secure this final triangular flap with a generous dab of hot glue or a strong adhesive dot. Repeat this process on the opposite side of the box, ensuring the fabric remains snug and symmetrical across the entire package.
Crafting and Attaching Ribbon Bows for a Rustic Look
Once your box is neatly encased in the burlap cloth roll, the next step is to design a ribbon bow that complements the rustic texture. The choice of ribbon material significantly influences the final look of your gift. A wide, wired ribbon in a cream, forest green, or deep crimson shade allows you to sculpt large, dramatic loops that resist sagging in humid conditions. If you prefer a more understated, organic appearance, a simple cotton herringbone ribbon or a soft linen band provides a beautiful, understated contrast.
To craft a classic looped bow, cut a length of ribbon approximately four times the width of your gift box. Fold the ribbon to create two equal-sized loops, resembling rabbit ears, and cross them over each other. Pass one loop through the central loop opening and pull both ends firmly to secure the knot. Gently tug and fluff the loops to adjust their volume, ensuring they are symmetrical. For a more elaborate presentation, you can layer a thinner ribbon directly over a wider one before tying them together, creating a multi-textured effect.
If you prefer a simpler, minimalist look, a rustic tie is an excellent alternative. Wrap a length of soft cotton ribbon or thick jute twine around the length and width of the box, crossing them at the bottom and bringing the ends back to the top. Tie a secure double knot in the center, leaving the tails long and cutting them at a sharp angle or a neat V-shape to prevent fraying.
Attaching your completed bow securely to the burlap requires the right technique. If you tied the ribbon directly around the package, the bow is already anchored. However, if you crafted the bow separately, you can secure it to the center of the package using a heavy-duty glue dot or a small dab of hot glue applied directly to the knot’s underside. Press the bow firmly onto the burlap, holding it in place for a few seconds to ensure a permanent bond with the fabric fibers.
Adding Finishing Touches to Complete the Rustic Aesthetic
The true magic of rustic gift wrapping lies in the subtle layering of textures and natural elements. Once your burlap wrap and ribbon bow are in place, you can introduce additional decorative details to elevate the overall design without cluttering the presentation.
Start by layering different materials to create visual depth. For instance, you can wrap a few strands of thin jute twine over a wide satin ribbon, blending the rough, earthy texture of the twine with the smooth, elegant sheen of the satin. This contrast highlights the unique qualities of both materials and draws the eye to the center of the gift.
Next, incorporate natural accents that reflect a warm, organic lifestyle. You can tuck a small sprig of dried local ferns, a slender cinnamon stick, or a delicate dried flower under the central knot of your ribbon bow. These botanical elements add a touch of life and color to the neutral tones of the burlap. If you are preparing gifts for a holiday celebration, a small dried pinecone or a sprig of rosemary can provide a beautiful, fragrant accent.
Finally, personalize your gift with a custom tag. Sturdy kraft paper tags are the perfect match for the rustic aesthetic of burlap. Because the brown kraft paper has a textured, medium-toned surface, standard blue or black ballpoint pens can sometimes look faint or washed out. To ensure your handwritten messages are highly visible and elegant, use a metallic gold, silver, or opaque white gel pen. Before writing on your final tag, perform a quick test on a scrap piece of kraft paper to verify the ink’s drying speed and bleed resistance, as some gel inks can feather on highly porous paper fibers. Write your recipient’s name clearly, let the ink dry completely to prevent smudging, and thread a short piece of twine through the tag’s eyelet to tie it securely to your ribbon bow.
Frequently Asked Questions (FAQ)
How to Prevent the Burlap Cloth Roll From Fraying
To minimize fraying, always use exceptionally sharp fabric scissors and cut the burlap cloth roll in a single, clean stroke rather than using a sawing motion. If you encounter highly loose weaves, you can run a very thin line of clear craft glue or fabric sealant along the cut edge and allow it to dry completely before wrapping. Alternatively, simply fold the raw cut edges inward by half an inch before securing them with adhesive to hide any loose threads inside the wrap.
How to Wrap So the Burlap Can Be Reused
To make your burlap wrapping fully reusable, avoid applying permanent adhesives directly to the fabric. Instead of using hot glue or heavy-duty tape on the seams, wrap the burlap tightly around the box and secure the folds mechanically using long strands of jute twine or ribbon tied firmly around the entire package. This allows the recipient to easily untie the twine, unwrap the intact burlap cloth, and repurpose the fabric for future gift wrapping, table runners, or home craft projects.
Which Adhesives Work Best on Textured Burlap?
Standard clear office tape is ineffective on the coarse, uneven surface of a burlap cloth roll. For a secure bond, use heavy-duty double-sided fabric tape, strong glue dots, or a low-temperature hot glue gun. If you prefer to avoid adhesives entirely, you can rely on structural ties like thick jute twine or wide cotton ribbons wrapped tightly around the package to hold all the fabric folds securely in place.

Community discussion
Share your experience or ask a question. Comments are reviewed before publication.