
Wrapping a gift in clear, sparkling cellophane instantly elevates its presentation, turning a simple basket or box into an elegant, professional-looking package. This versatile wrapping style is perfect for showcasing colorful contents, from festive fruit baskets to curated stationery sets, while protecting them from dust and tropical humidity. By mastering a few basic folding and gathering techniques, you can achieve a crisp, boutique-quality finish right at home. The final touch—a beautifully tied ribbon bow—not only secures the wrapping but also serves as the stunning focal point of your presentation.
Materials and Tools You Will Need
To achieve a flawless finish, selecting the right materials is crucial. Cellophane is available in various thicknesses, typically measured in microns. For most gift-wrapping projects, a thickness of 30 to 40 microns offers the ideal balance of flexibility and tear resistance. Standard clear rolls are highly versatile, but you can also find tinted or patterned options to suit specific occasions. Ensure the roll width is wide enough to cover your entire gift with ample room for gathering at the top.
Your choice of ribbon dictates the overall character of the package. Wired ribbons feature thin wire edges wrapped in fabric, making them exceptionally easy to shape, fluff, and hold in place, which is ideal for large, dramatic bows. Unwired ribbons, such as satin, grosgrain, or organza, offer a softer, more fluid drape that works beautifully for classic bows. For smaller gifts, a ribbon width of 1/2 inch to 1 inch is appropriate, while larger baskets benefit from wider ribbons of 1.5 to 2.5 inches.
Products mentioned in this guide
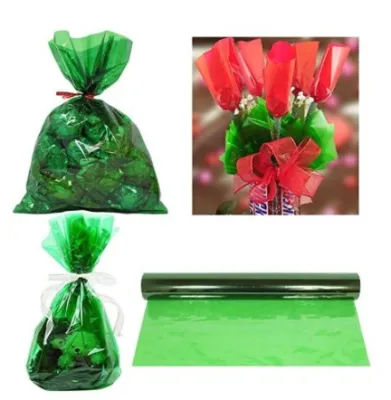
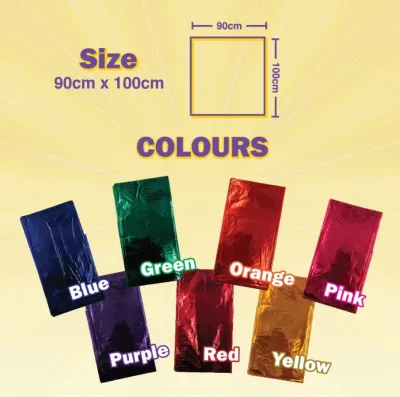
![[DKI Enterprises] 5pcs Cellophane Plastic Wrapper 35x39 inch](https://img.lazcdn.com/g/p/20e56bddb50b6e16ae70b628b0888ea8.jpg_400x400q80.jpg_.webp)
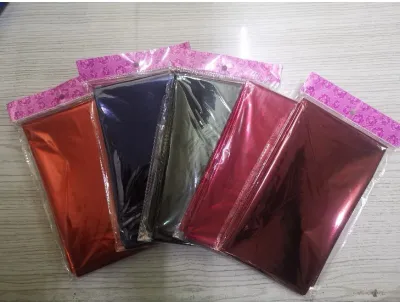
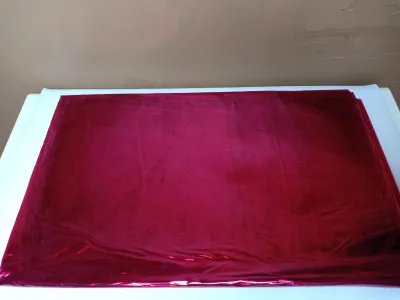
Prices are valid at publication and may change. Please refer to the product page for the latest price.
Gather your basic tools before you begin to keep the process seamless. You will need a pair of exceptionally sharp scissors to ensure clean cuts without snagging the delicate edges of the cellophane. High-quality clear tape or double-sided tape is essential for securing seams invisibly. Finally, keep a measuring tape or ruler nearby to calculate your cuts accurately, preventing unnecessary waste of your wrapping supplies.
Preparing the Gift and Cellophane
A successful wrap starts with proper preparation of both the gift and your workspace. If you are wrapping multiple loose items, such as a collection of notebooks, pens, and small accessories, arrange them securely inside a sturdy gift box or a woven basket first. This provides a solid, stable base and prevents items from shifting or toppling over during the wrapping process. For baskets, place heavier items at the bottom and lighter items on top to maintain balance.

Measuring your cellophane accurately is the key to avoiding awkward seams or running short of material. Lay the cellophane flat on your work surface and place the gift in the center. Pull the cellophane up on both sides to meet above the top of the gift; you should have at least six to eight inches of excess material at the top to allow for gathering and tying. For boxed gifts, ensure the sheet is wide enough to wrap around the box completely with a two-inch overlap, with enough excess on the ends to fold flat.
Tropical climates can introduce challenges like high humidity and static electricity, which make cellophane cling to itself or attract dust particles. Set up your workspace on a clean, flat, and completely dry table. Wipe down the surface beforehand to remove any dust or debris that might stick to the static-charged wrap. If static cling becomes difficult to manage, working in a well-ventilated room or lightly wiping your hands with a dry cloth can help minimize the effect.
Step-by-Step Cellophane Wrapping Techniques
Cellophane behaves differently than standard wrapping paper because it is highly springy and prone to showing sharp creases if mishandled. To maintain its signature crystal-clear clarity, handle the sheet gently, avoiding tight grips that can cause premature crinkling. When securing seams, always aim to place tape in discreet locations, such as the underside of a basket or along the natural edges of a box, to keep the adhesive completely hidden from view.
The Classic Gather-and-Tie Method for Baskets and Odd Shapes
The gather-and-tie method is the most reliable technique for wrapping irregular items, round baskets, or cylindrical gifts. Begin by unrolling your cellophane on your clean workspace and cutting a generous piece based on your earlier measurements. Place your basket or gift directly in the center of the sheet, ensuring it is perfectly balanced so the wrap does not pull unevenly to one side.
Reach for the front and back edges of the cellophane, bringing them straight up and meeting them directly above the center of the gift. While holding these two edges together with one hand, use your other hand to bring the left and right sides upward to meet in the middle. Carefully gather all the gathered material into a tight, uniform neck just above the top of the gift, smoothing out any large pleats as you pull upward.
Once you have gathered the neck securely, hold it tightly with one hand. To make the final ribbon-tying step much easier, temporarily secure this neck using a twist tie, a piece of clear tape, or a chenille stem. This temporary bind holds the tension in place, freeing up both of your hands to focus entirely on crafting a beautiful, symmetrical ribbon bow without worrying about the cellophane slipping or unraveling.
The Flat Envelope Fold for Boxed Gifts
For rectangular or square boxes, a flat envelope fold provides a tailored, modern look that mimics traditional wrapping paper while showcasing the box’s contents. Start by centering your box face down on the cut cellophane sheet. Pull the long sides of the cellophane tightly over the bottom of the box, overlapping them by about an inch, and secure the seam down the middle with a few small pieces of double-sided or clear tape.
Next, turn your attention to the open ends of the box. Push the top layer of cellophane downward against the side of the box, creating two neat, diagonal flaps on the left and right sides. Crease these diagonal side flaps gently but firmly against the box’s edge to establish a clean, geometric shape. Fold the side flaps inward so they lie flat against the end of the box.
Finaly, fold the remaining bottom tab upward over the side flaps to create a clean, envelope-like triangle. Pull this tab tightly to ensure the wrap is snug across the entire box, then secure it in place with a small piece of clear tape. Repeat this exact process on the opposite end of the box, ensuring both sides are symmetrical and tightly sealed for a polished, professional presentation.
Tying and Finishing With a Ribbon Bow
With your cellophane securely wrapped, the final step is to add a decorative ribbon bow that cancels any structural ties and completes the aesthetic. The placement of your ribbon depends on the wrapping style: for gathered baskets, wrap it directly over the temporary tie at the neck, while for flat boxes, run the ribbon around the length and width of the box to intersect at the center.
Tying a Classic Bow
To tie a classic bow, cut a length of ribbon—typically around 24 to 30 inches, depending on the size of your gift. Wrap the ribbon around the gathered neck of the cellophane or the center of your box, crossing the ends to tie a simple, firm knot. Adjust the tension of this initial knot so it sits flat and snug against the wrap, ensuring it will not slip or loosen.
Form a loop with one end of the ribbon, holding it securely between your thumb and forefinger. Take the other free end of the ribbon, wrap it around the base of the loop, and push it through the opening underneath to create a second loop. Pull both loops gently in opposite directions to tighten the bow, adjusting the size of the loops and the length of the tails until they are perfectly symmetrical.
To give your classic bow a professional finish, trim the tails neatly. Use your sharp scissors to cut the ends at a sharp 45-degree angle, or fold each tail vertically in half and cut diagonally upward from the folded edge to the outer edge to create a classic V-cut. This simple step prevents the ribbon fibers from fraying and adds an instant touch of elegance.
Creating a Multi-Loop Bow for a Fuller Look
A multi-loop bow offers a dramatic, voluminous finish that works exceptionally well on large gift baskets. For this technique, a wired ribbon is highly recommended because the wire edges allow you to shape and hold the loops easily. Begin by leaving a tail of about six inches, then make your first loop by folding the ribbon back on itself and pinching it tightly in the center.
Continue folding the ribbon back and forth to create additional loops on each side of your central pinch point, keeping each loop the same size. For a standard full bow, aim for three to four loops on each side of the center. Once you have created the desired number of loops, cut the ribbon, leaving a second tail of equal length to match the first.
While holding the pinched center firmly, wrap a short piece of floral wire, a chenille stem, or a thin binding ribbon tightly around the middle to secure all the loops together. Twist the wire tightly at the back to lock it in place. Finish by gently pulling and twisting each loop outward from the center, fluffing them up to create a balanced, spherical shape that completely hides the wire tie.
Troubleshooting Common Wrapping Issues
Working with cellophane can sometimes present unexpected challenges, but most issues are easily resolved with a few simple adjustments. If you accidentally tear a small section of the cellophane while pulling it tight, do not panic or discard the entire sheet. You can discreetly patch small tears by applying a small piece of clear, glossy tape over the tear on the inside of the wrap, making it virtually invisible.
Static cling is another frequent issue, especially in dry or air-conditioned environments, causing the cellophane to stick to your hands or attract unwanted lint. To combat this, you can lightly mist your hands with water or rub them with a dryer sheet before handling the wrap. Additionally, keeping a clean, damp microfiber cloth nearby allows you to quickly wipe down the exterior of the wrapped gift to remove any static-attracted dust.
If your ribbon bow looks droopy, uneven, or fails to hold its shape, the issue is often a lack of structural support or incorrect ribbon choice. For limp fabric ribbons, try tying the bow tighter at the base, or consider switching to a wired ribbon that can be easily reshaped. If a multi-loop bow is tilting to one side, ensure the central wire is wrapped tightly and centered perfectly, adjusting the loops outward to redistribute the weight evenly.
Frequently Asked Questions (FAQ)
Can I use cellophane to wrap food items directly?
Yes, but you must verify that the specific cellophane you are using is explicitly labeled as food-grade or food-safe by the manufacturer. Standard decorative craft cellophane rolls often contain chemical additives or colorants that are not safe for direct contact with food. Always check the product packaging for food-safe certifications before wrapping baked goods, chocolates, or fresh fruits directly in the material.
How do I keep wired ribbon from fraying at the ends?
To prevent wired ribbon from fraying, always use exceptionally sharp fabric scissors to make clean, decisive cuts. Cutting the ribbon tails at a steep 45-degree angle or a V-shape naturally reduces fraying compared to a straight horizontal cut. For synthetic or fabric ribbons prone to unraveling, you can also apply a tiny bead of clear fabric sealant or clear nail polish along the cut edges to lock the fibers in place.

Community discussion
Share your experience or ask a question. Comments are reviewed before publication.