
Selecting the right LED drawing board—often called a light pad or light box—requires balancing illumination quality, physical dimensions, and surface texture to match your specific creative workflow. Whether you are tracing intricate calligraphy, transferring sketches onto heavy watercolor sheets, or drafting animation frames, the ideal board must provide consistent, flicker-free light without causing eye strain or physical discomfort. By focusing on key specifications such as active drawing area, adjustable brightness levels, power source versatility, and surface durability, you can find a tool that seamlessly integrates into your creative space.
Understanding Your Art Needs and Workspace
Before diving into technical specifications, take a moment to analyze your primary artistic medium and physical environment. Different creative disciplines demand distinct board characteristics. For instance, animators and calligraphers who work primarily with thin layout paper or tracing sheets do not require the same high-intensity illumination as fine artists who need to project lines through heavy 300 GSM watercolor paper. Identifying your typical paper weight early prevents you from overpaying for excessive brightness or, conversely, struggling with an underpowered light source.
Your physical workspace also dictates the ideal footprint of your drawing board. If you work at a dedicated, spacious drafting table, a larger, semi-permanent board can remain plugged in and ready. However, if you share a dining table or work in a compact room, you must consider how easily the board can be stored away when not in use. In tropical climates like the Philippines, where high humidity can cause paper to warp or absorb moisture from the air, having a dedicated, dry storage drawer or protective sleeve for your board and paper is highly beneficial.
Products mentioned in this guide
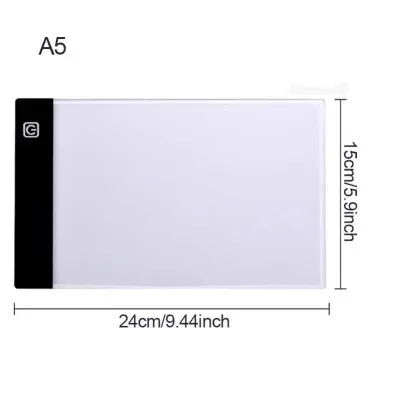
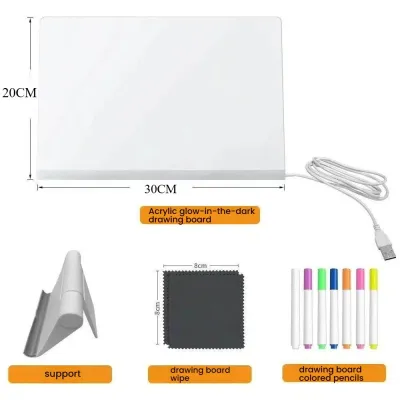
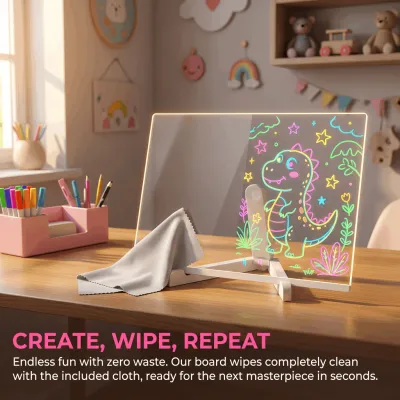
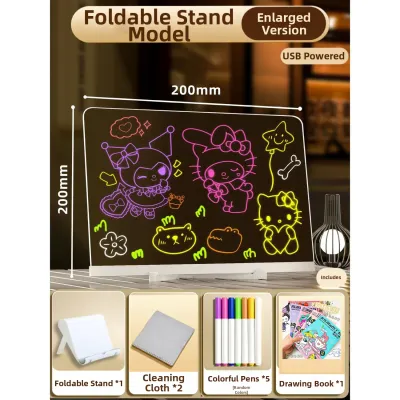
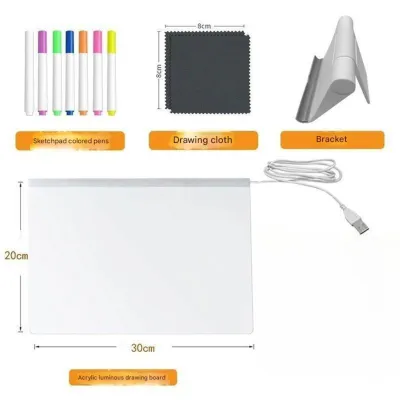
Prices are valid at publication and may change. Please refer to the product page for the latest price.
Mobility is another critical factor to weigh. Ask yourself if your sketching sessions are confined to a single desk or if you frequently move between a home studio, local cafes, or outdoor locations. A lightweight, battery-operated board offers unmatched freedom for field sketching, whereas a heavier, mains-powered board provides the stability and consistent power delivery preferred for long, uninterrupted studio sessions.
Essential Features to Evaluate in an LED Drawing Board
Evaluating an LED drawing board requires looking past aesthetic designs and focusing on the core hardware specifications that directly affect your daily drawing comfort. The market offers a wide range of options, from entry-level hobbyist pads to professional-grade drafting tools. Understanding how these technical dimensions and lighting metrics interact will help you make an informed decision.

Size and Active Drawing Area
When browsing LED drawing boards, it is vital to distinguish between the overall physical dimensions of the device and its actual active drawing area. The active area is the illuminated portion of the screen where you can actually trace and sketch. Manufacturers often label boards by standard paper sizes, such as A4, A3, or A2, but the outer frame or bezel can add several centimeters to the overall footprint. Always check the exact millimeter measurements of the illuminated zone to ensure your preferred paper size fits entirely within the light field without clipping the edges of your artwork.
The width of the bezel also plays a practical role in drawing comfort. A wider bezel provides a comfortable resting place for your wrist, preventing your hand from falling off the edge of the board while working on the borders of your drawing. However, an excessively wide bezel increases the overall size of the board, making it more cumbersome to pack into a backpack or store in a tight drawer.
Thickness and weight are equally important for both portability and desk stability. Ultra-thin boards, often measuring between 5mm and 8mm, are highly portable and sit low on the desk, minimizing wrist extension. However, extremely thin plastic boards may flex under heavy hand pressure, which can distort your lines. If you tend to press down hard while sketching or use heavy tools, a slightly thicker, more rigid board will provide a more stable, reliable drawing surface.
Brightness Levels and Light Uniformity
The quality of light emitted by an LED drawing board is paramount to preventing eye strain during extended drawing sessions. Look for boards that feature adjustable brightness controls rather than a single, fixed light setting. Stepless dimming, which allows you to smoothly adjust the light intensity by holding down the power button, offers the greatest flexibility. This feature enables you to perfectly match the illumination to the ambient light of your room and the specific thickness of the paper you are using, preventing the harsh glare that causes headaches.
Light uniformity is another critical metric that separates high-quality boards from budget alternatives. Uniformity refers to how evenly the light is distributed across the entire active area. Cheaper boards often suffer from hot spots near the LED strips along the edges and dark zones in the center. This uneven lighting can distort your perception of line weight and detail. When evaluating a board, look for models that specify edge-to-edge uniformity, ensuring a consistent level of brightness across every square centimeter of the screen.
Additionally, prioritize boards that explicitly feature flicker-free technology. LEDs naturally cycle on and off at high frequencies to control brightness, which can cause a subtle, often imperceptible flicker. Over hours of close-up work, this flicker forces your eye muscles to constantly adjust, leading to rapid fatigue, dryness, and strain. A high-quality, flicker-free constant current driver ensures a steady, smooth light output that protects your vision during long sketching sessions.
Power Source and Portability
How your LED drawing board receives power directly influences where and how you can use it. USB-powered boards are highly popular due to their exceptional versatility. These devices can draw power from a variety of common sources, including laptops, portable power banks, and standard USB wall adapters. This makes them highly convenient for artists who travel or prefer to work in different areas of their home without being tethered to a single electrical outlet.
For complete cordless freedom, some advanced models feature built-in rechargeable lithium-ion batteries. A battery-operated board is ideal for outdoor sketching, urban drafting, or working in spaces where power outlets are scarce. When considering a battery-powered option, verify the estimated operating hours on a full charge at your typical brightness level. Keep in mind that running the board at maximum brightness to penetrate thick paper will drain the battery significantly faster than using it on a low setting for thin tracing paper.
Do not overlook the practical details of the power cable and connector type. USB-C connectors are generally more durable and easier to plug in than older Micro-USB ports, which can wear out or bend over time with frequent use. Additionally, ensure the included cable is long enough to comfortably route from your desk surface to your power source without creating a tight, dangling hazard that could pull the board off your workspace.
Surface Material and Paper Compatibility
The physical surface of an LED drawing board is your direct interface with your creative tools, making its material composition and texture highly influential to your drawing experience. Most modern light pads utilize an acrylic or polycarbonate top plate. A matte surface finish is highly recommended for sketching, as it provides a subtle tooth or friction that mimics the feel of traditional paper. This texture prevents your pencil tip from sliding uncontrollably, giving you better line control. Conversely, a glossy surface can create distracting reflections from overhead lights and may feel sticky against your hand, especially in warm, humid tropical environments.
Scratch resistance is a vital factor to check on product labels and specifications. When tracing, you will often apply pressure with sharp graphite pencils, colored pencils, or even metal compasses and craft knives. A soft, low-quality plastic surface will quickly accumulate fine scratches, which catch the light from the LEDs and create bright, distracting lines across your workspace. Look for boards that feature a hardened, scratch-resistant acrylic layer to ensure long-term clarity and a smooth drawing path.
Paper compatibility is directly tied to both the surface texture and the maximum light output of the board. Standard printer paper (80 GSM) and tracing paper (50-60 GSM) are easily penetrated by almost any LED board. However, if you plan to work with heavy cardstock, bristol board (200+ GSM), or watercolor paper (300 GSM), you must verify that the board’s maximum brightness is sufficient. Check the manufacturer’s guidelines or user reviews to confirm if the light can effectively shine through your preferred paper weight, saving you from the frustration of a dim, unusable workspace.
Additional Functionalities and Ergonomics
Beyond the core lighting and size specifications, several secondary features can significantly enhance your daily workflow and physical comfort. Drawing on a flat surface for hours can lead to neck strain, shoulder tension, and wrist fatigue. To combat this, look for LED drawing boards that come with adjustable stands or integrated tilt mechanisms. Elevating the board to a comfortable angle helps maintain a healthy, upright posture and reduces the strain on your cervical spine.
Some boards incorporate built-in rulers or grid lines along the edges of the active area. These markings are incredibly useful for technical illustrators, architects, calligraphers, and animators who require precise measurements and straight alignment. However, if you primarily focus on freehand sketching or organic forms, ensure these grid lines are subtle and do not distract from your composition. Integrated edge clips or magnetic clamps are also valuable additions, as they securely hold your paper in place, preventing shifting while you trace.
The placement and design of the control buttons deserve careful inspection. Many modern boards feature touch-sensitive buttons flush with the surface. While sleek, poorly positioned touch buttons can be easily triggered by your palm or forearm as you move across the board, leading to accidental power-offs or sudden brightness changes. Look for models with recessed physical buttons, buttons located on the side edges, or smart lock features that temporarily disable the touch controls while you work.
Evaluation Checklist for Your Shortlist
To help you narrow down your choices and select the perfect LED drawing board for your studio, use this structured evaluation framework to compare different models.
| Feature Category | Specification to Verify | Target Requirement for Your Workflow |
|---|---|---|
| Active Area | Millimeter dimensions of illuminated zone | Must fit your standard paper size (e.g., A4 or A3) |
| Brightness | Lumens or Lux rating and adjustment type | Stepless dimming preferred; high output for heavy paper |
| Power Source | USB-C, Micro-USB, or Built-in Battery | Match to your mobility needs and desk setup |
| Surface Finish | Matte vs. Glossy acrylic | Matte preferred for pencil grip and glare reduction |
| Ergonomics | Stand compatibility and button placement | Side-mounted or recessed buttons to prevent accidental touch |
Before making a final purchase, cross-reference the product labels and official user manuals to verify exact paper weight limits and specific surface care instructions. If purchasing from an online marketplace or local stationery store, check the return policy to ensure you can perform a physical test upon arrival.
Once you receive the board, conduct a simple in-person test to verify its quality. Turn the board on in a dimly lit room and set it to its maximum brightness. Inspect the surface closely for any dark spots, flickering, or uneven light distribution. Place a sheet of your heaviest drawing paper on top and trace a few lines with your preferred pencil to evaluate the surface friction and ensure the light penetrates clearly. This hands-on verification ensures your new LED drawing board will be a reliable, comfortable companion for your creative journey.
Frequently Asked Questions (FAQ)
Can I use an LED drawing board with thick watercolor paper? (FAQ)
Yes, you can use an LED drawing board with watercolor paper, but it depends heavily on the paper’s weight and the board’s maximum brightness. Standard 300 GSM watercolor paper is quite thick and textured, which diffuses light and makes tracing difficult on low-power boards. To successfully transfer sketches onto heavy media, look for a professional-grade board with high maximum lux levels. Alternatively, you can trace your design onto thinner transfer paper first, then use graphite transfer paper to manually press the lines onto your watercolor sheet.
How do I clean the surface of my LED drawing board safely? (FAQ)
To maintain a clear, scratch-free drawing surface, always unplug the board from its power source before cleaning. For daily maintenance and dust removal, gently wipe the surface with a soft, dry microfiber cloth. To remove stubborn graphite smudges, ink splatters, or oils from your hands, slightly dampen the microfiber cloth with water or a mild, diluted dish soap solution. Never spray liquids directly onto the board, and avoid harsh solvents, alcohol, or abrasive pads, which can permanently cloud or scratch the acrylic surface. Always consult your product’s manual for material-specific care instructions.

Community discussion
Share your experience or ask a question. Comments are reviewed before publication.