
To find the best polymer clay set with tools for beginners in the Philippines, you need a kit that balances a diverse color palette with durable, reusable tools like acrylic rollers and steel shaping implements, rather than cheap plastic alternatives that bend under pressure. In our tropical climate, where ambient heat can prematurely soften or degrade poorly stored clay, selecting a kit with airtight storage and clear baking instructions is essential for a successful start. Whether you want to create custom jewelry, miniature figurines, or decorative home items, starting with a well-configured kit ensures you have all the necessary materials to learn the craft without unnecessary frustration.
The popularity of handmade crafts has grown significantly across the country, with many local artisans turning polymer clay sculpting into thriving home-based businesses. For a beginner, the transition from air-dry clay or traditional play dough to polymer clay requires a shift in how you handle, shape, and cure your medium. Because polymer clay does not harden until it is baked, having the right set of tools allows you to work at your own pace, refining details and correcting mistakes without the pressure of a drying deadline. Investing in a comprehensive starter set is the most cost-effective way to acquire these specialized tools while securing a versatile selection of clay colors.
Core Criteria for Evaluating Beginner Clay Kits
When starting your polymer clay journey, the sheer variety of kits available on Philippine e-commerce platforms can be overwhelming. To make an informed decision, you must evaluate how a kit balances clay volume against color variety. Many beginner kits offer dozens of tiny, multi-colored blocks, which are excellent for small projects like earrings or miniature figures. However, if you plan to sculpt larger items, you will quickly run out of primary colors like white, black, and red. A good rule of thumb is to look for kits that offer at least 20 grams per color block, ensuring you have enough material to practice basic techniques before needing to purchase individual replacement blocks.
Products mentioned in this guide
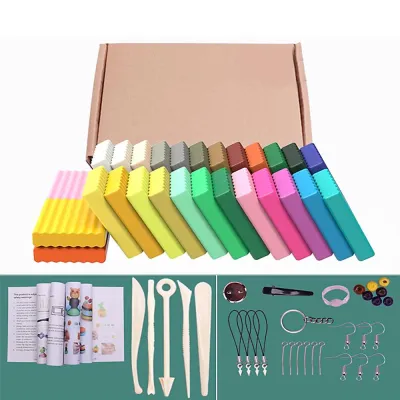
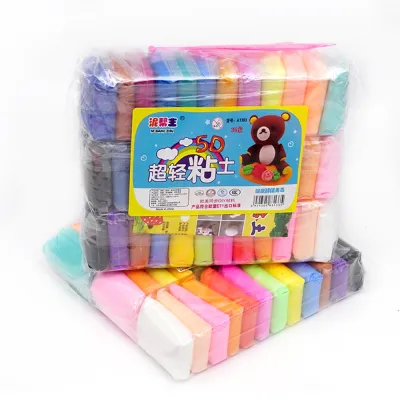
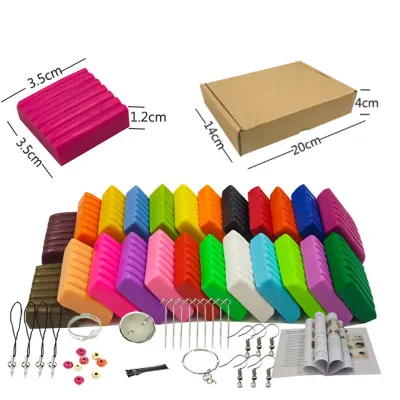
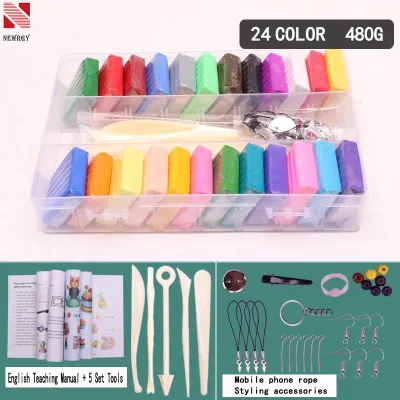
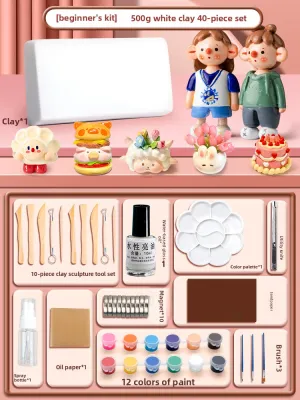
Prices are valid at publication and may change. Please refer to the product page for the latest price.
Tool quality is another critical factor that separates a frustrating crafting experience from an enjoyable one. While almost all beginner kits include basic plastic tools, these often flex or snap when working with firmer clay brands. Furthermore, cheap plastic tools frequently have prominent mold lines along their edges, which can leave unwanted marks on your clay surface that require tedious sanding later. Investing in a kit that features metal-tipped dotting tools, stainless steel blades, and solid acrylic rollers will provide much better precision, cleaner cuts, and long-term durability.
Finally, consider the packaging and storage solutions included with the kit. Polymer clay does not dry out in the air, but it is highly susceptible to collecting dust, pet hair, and lint from the surrounding environment. In humid and warm Philippine climates, open clay can also become sticky and difficult to handle if left exposed to ambient heat. A kit that comes in a sturdy, multi-tier plastic storage box with secure latches will keep your supplies organized, clean, and protected from dust. Having a dedicated storage container also makes it easier to pack away your tools and clay blocks, keeping your creative workspace tidy.
Essential Tools to Look for in a Starter Set
A complete starter set should eliminate the need for immediate secondary purchases by including a core group of shaping and cutting implements. The most important of these is the acrylic roller, which allows you to flatten clay to a uniform thickness without leaving the texture marks or fiber residue that wooden rolling pins often leave behind. Alongside the roller, a flexible steel tissue blade is essential for making clean, straight cuts through clay canes and slabs without distorting your designs. Because these blades are incredibly sharp, they must be handled with care and stored in protective sleeves when not in use.

For surface texturing and detailing, look for kits that include double-ended ball stylus tools and needle tools. Ball styluses are invaluable for smoothing seams, creating organic curves, and shaping flower petals or miniature food items. Needle tools allow you to etch fine details, create realistic textures like fur or woodgrain, and pierce clean holes through beads before baking. Silicone brush shapers are also highly beneficial, as they let you blend joints and erase fingerprints without altering the underlying structure of your sculpture.
Baking accessories and safety gear are often overlooked but are vital for a successful finish. A high-quality silicone craft mat provides a non-stick, heat-resistant workspace that can go directly from your table to the oven tray, minimizing the risk of distorting your delicate creations during transport. Most importantly, ensure your kit or setup includes a dedicated oven thermometer. Built-in dials on home toaster ovens are notoriously inaccurate, and maintaining the correct temperature is the only way to prevent under-baking or scorching your clay.
Assessing Clay Quality and Baking Requirements
Before you begin sculpting, you must verify the clay’s suitability and safety by carefully reading the manufacturer’s instructions on the packaging. Polymer clay is a synthetic material composed of polyvinyl chloride (PVC) binders and liquid plasticizers that require precise heat to cure. Most brands require baking temperatures between 110°C and 130°C. Deviating from these guidelines can result in brittle, easily broken pieces if under-baked, or toxic fumes and charred projects if over-baked. Always check the packaging for the recommended baking time per millimeter of clay thickness.
Safety should always be a priority, especially when crafting in a home environment. Look for non-toxic safety certifications, such as the AP (Approved Product) seal or the CE mark, printed clearly on the kit’s packaging. These certifications guarantee that the clay does not contain harmful phthalates or heavy metals, making it safe for home baking. However, even certified non-toxic clay should never be baked on surfaces used directly for food preparation; always use dedicated baking sheets, ceramic tiles, or foil liners to protect your kitchen equipment.
The physical consistency of the clay, known as its firmness, greatly impacts your crafting experience. Beginner-friendly clays should be soft enough to condition quickly but firm enough to hold fine details without slumping under the warmth of your hands. In the Philippines, our high ambient temperatures naturally soften clay, which can make exceptionally soft brands feel sticky or mushy. If your clay feels too soft, you can leach out excess plasticizers by pressing the clay between sheets of clean printer paper for a few hours before use. Conversely, if the clay is too firm, kneading it thoroughly or adding a drop of clay softener will restore its pliability.
Building Your Shortlist: Kit Profiles and Trade-offs
To find the right polymer clay set, you should match your specific crafting goals with one of three primary kit configurations. Basic Starter Kits are highly economical, typically ranging from ₱300 to ₱600. These kits focus on providing a modest selection of 12 to 24 primary colors alongside basic plastic tools. They are an excellent, low-risk option for absolute beginners, hobbyists on a budget, or parents looking for a creative weekend activity with their children. While the tools are basic, they are sufficient for learning the fundamentals of clay conditioning, shaping, and baking.
If you want to focus on color blending and complex patterns, High-Volume Color Kits are the ideal choice. Priced between ₱700 and ₱1,200, these sets prioritize clay quantity, often offering 32 to 50 different shades in larger block sizes. While the included tools are usually basic, the vast color palette allows you to experiment with intricate techniques like millefiori canes, marble effects, and custom color mixing without the fear of running out of material. This configuration is highly recommended for crafters who want to explore miniature sculpting or detailed mosaic work.
For those who want to create finished, professional-looking items immediately, Comprehensive Crafting Kits offer the most value. These premium sets, which generally cost ₱1,500 or more, include specialized accessories such as earring hooks, jump rings, hairpin blanks, silicone molds, and clear glaze. They also feature higher-quality metal or wooden tools. This configuration is perfect for aspiring entrepreneurs who want to start a small jewelry or accessory business right out of the box, as it provides all the hardware needed to turn raw clay into wearable art.
Pre-Purchase Checks for Online Marketplaces
When shopping on local e-commerce platforms, taking a few minutes to perform pre-purchase checks can save you from receiving unusable materials. Start by thoroughly reviewing seller ratings and customer feedback. Look specifically for reviews with photos or videos that demonstrate the clay’s flexibility. If multiple buyers complain that the clay arrived rock-hard, crumbly, or completely dried out, it is a strong sign of poor storage conditions in the seller’s warehouse or an expired batch of stock.
Because polymer clay can degrade or partially cure when exposed to high temperatures over long periods, ask the seller about the manufacturing batch or stock rotation. Packages often sit in hot delivery hubs or delivery rider bags under the sun, which can heat-cure the clay before it even reaches your doorstep. Fresh clay should feel slightly yielding when pressed through its plastic wrapper. If you receive a batch that has been sitting in a hot tropical warehouse for years, it may require excessive conditioning or specialized clay softeners to become workable again.
Finally, always confirm the seller’s return and refund policies before finalizing your purchase. Crafting kits contain many small, delicate components, and it is not uncommon for plastic storage boxes to crack or for liquid glazes to leak during transit. A reliable seller should offer a hassle-free return policy for damaged, defective, or incomplete kits, ensuring your investment is fully protected. Checking these details beforehand ensures a smooth, risk-free introduction to the world of polymer clay crafting.
Frequently Asked Questions (FAQ)
Can I bake polymer clay in a regular kitchen oven?
Yes, you can bake polymer clay in a standard household toaster oven or conventional kitchen oven, provided you monitor the temperature closely. Never use a microwave, as it heats unevenly and will ruin the clay. Always use a separate oven thermometer to verify the temperature matches the manufacturer’s instructions, and bake in a well-ventilated area. If you use your primary kitchen oven, ensure the clay is baked on a dedicated tray lined with foil or parchment paper, and clean the oven thoroughly afterward.
How do I store leftover polymer clay to prevent it from drying out?
While polymer clay does not dry out from air exposure like water-based clay, it should be stored in a cool, dry place away from direct sunlight to prevent premature curing. Wrap opened blocks in cling wrap, wax paper, or polypropylene (PP) plastic bags, and store them in an airtight container to keep out dust and tropical humidity. Avoid storing raw clay in direct contact with polystyrene containers or certain soft plastics, as the plasticizers in the clay can react with and dissolve these materials over time.

Community discussion
Share your experience or ask a question. Comments are reviewed before publication.