
Stepping out of the studio to paint outdoors—a practice known as plein air painting—offers an unmatched way to capture the vibrant light and natural colors of your surroundings. For beginners, however, the transition from a spacious desk to the open air can feel overwhelming. The key to a successful outdoor painting session lies not in carrying your entire art collection, but in assembling a highly curated, lightweight watercolor travel kit. By focusing on a few versatile, high-quality essentials, you can paint comfortably in a local park, on a busy street corner, or along a windy coastline without feeling weighed down by heavy gear.
A well-planned travel kit balances portability with functionality. It should contain everything you need to mix colors, control water, and protect your paper, all while fitting neatly into a single shoulder bag. In tropical climates where sudden humidity shifts, bright sunlight, and unexpected rain showers are common, your choice of materials becomes even more critical. Selecting the right tools ensures that your painting process remains enjoyable and stress-free, allowing you to focus entirely on the beauty of the landscape.
The Essential Gear for a Beginner Plein Air Kit
When assembling your first outdoor watercolor setup, the temptation to pack every brush, tube, and accessory you own is incredibly strong. However, heavy bags quickly lead to physical fatigue, which drains your creative energy before you even lay down your first wash. The absolute baseline setup for a beginner plein air kit requires only six core items: a compact paint palette, one or two versatile brushes, a reliable water container, high-quality watercolor paper, a rigid backing board, and a few stabilizing accessories. Keeping this list minimal ensures you can set up and pack away your station in under five minutes, while saving you thousands of pesos (₱) on unnecessary gear.
Products mentioned in this guide
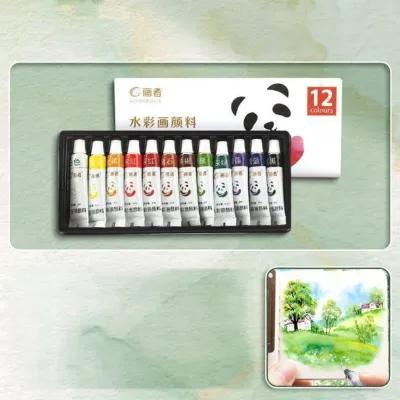
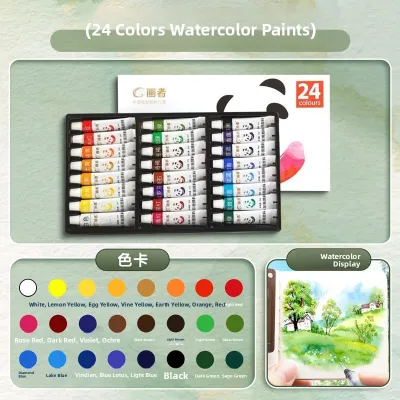
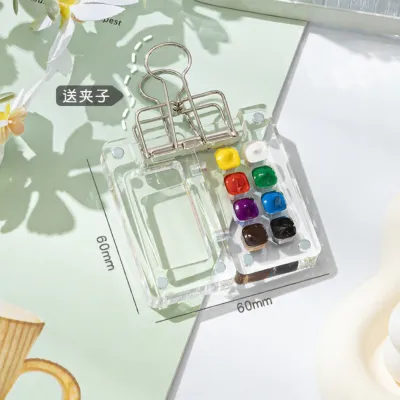
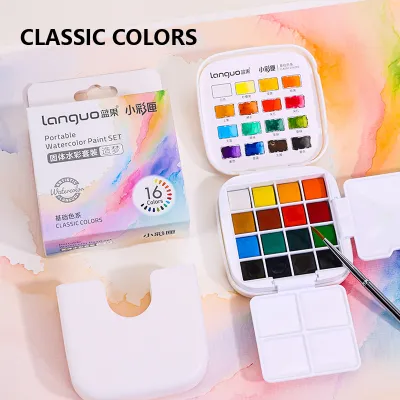
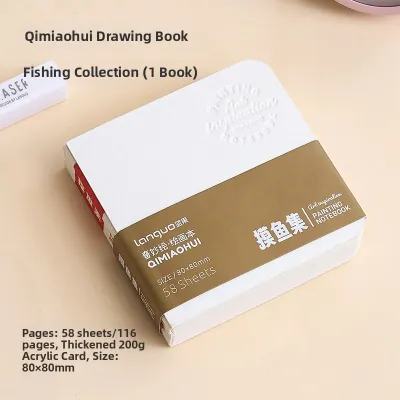
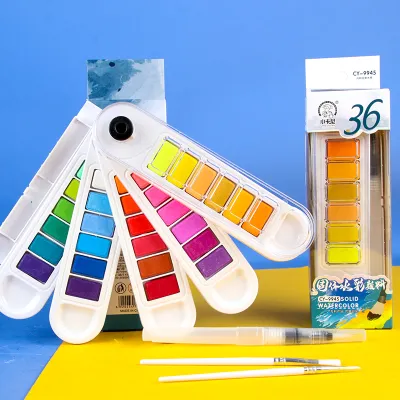
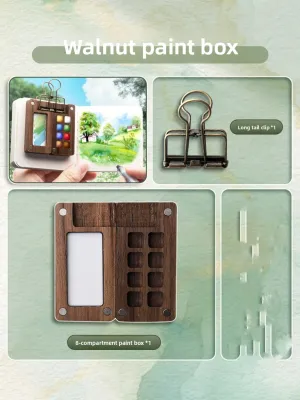
Prices are valid at publication and may change. Please refer to the product page for the latest price.
Adhering to the “less is more” principle is the best way to build confidence as an outdoor painter. A lightweight kit encourages spontaneity, making it easy to stop and paint whenever inspiration strikes. If your gear is too bulky, the sheer effort of unpacking it can discourage you from starting. By limiting your tools, you also force yourself to master color mixing and brush control, which ultimately accelerates your growth as an artist.
Before heading out for your first official painting excursion, conduct a complete dry run at home. Set up your entire kit on your lap or arrange it on a small folding table. This trial run allows you to verify the total weight of your bag, test the balance of your palette in your hand, and see how quickly you can access your water and brushes. Identifying any awkward design flaws or missing items in the comfort of your living room saves you from frustrating complications when you are out in the field.
Selecting Paints and Palettes for Outdoor Conditions
The heart of your travel kit is your paint and the surface you mix it on. For outdoor work, dry half-pans are almost always superior to wet tubes of paint. Half-pans are small, solid cakes of dry watercolor pigment housed in plastic cups. They are incredibly lightweight, dry to the touch, and eliminate the risk of messy paint spills inside your bag. Tubes, on the other hand, can easily leak under pressure changes or become runny and difficult to control in hot, tropical weather where the binding medium can separate from the pigment.

Your travel palette should be compact yet highly functional. Look for a sturdy metal tin or a durable plastic case that features built-in mixing wells on the inside of the lid. A secure closure mechanism, such as a strong latch or a rubber gasket seal, is essential to prevent any residual moisture from leaking onto your other supplies after a session. Plastic palettes keep the overall weight low, while metal tins offer superior durability against accidental drops on hard outdoor surfaces.
When it comes to color selection, beginners do not need a massive array of twenty or thirty different shades. A limited, highly versatile palette of six to eight colors is far more practical for travel and teaches excellent color theory. A classic split-primary palette—consisting of a warm and cool version of red, yellow, and blue, along with an earth tone like burnt sienna—allows you to mix almost any color in nature. This approach not only saves space but also ensures color harmony throughout your painting.
When purchasing your paints, always check the manufacturer labels for lightfastness ratings, which are typically indicated by Roman numerals or star symbols. Outdoor paintings are often exposed to intense, direct sunlight during the creation process. Using highly lightfast pigments ensures that your sketches and finished pieces will not fade or discolor over time, preserving your outdoor memories for years to come.
Choosing Travel-Friendly Brushes and Water Control
In a studio setting, you might use a dozen different brushes for a single painting, but in the field, you only need one or two highly dependable tools. A medium-sized round brush, such as a size 6 or size 8, is the ultimate workhorse for plein air painting. A high-quality round brush can hold a generous amount of water for broad washes while maintaining a sharp, fine point for precise detail work. If you enjoy painting architectural elements or clean, geometric horizons, adding a small flat brush to your kit can be highly beneficial.
When selecting travel brushes, look for synthetic fibers that offer a good balance of “snap” (the ability of the bristles to spring back into shape) and water retention. Synthetic brushes are particularly well-suited for travel because they are highly durable, resist damage from rough outdoor surfaces, and dry much faster than natural hair brushes. In humid environments, fast-drying bristles are a major advantage, as they significantly reduce the risk of mold or mildew developing inside your closed brush case.
The physical design of your brush handles also plays a major role in portability. Standard studio brushes have long handles that are difficult to pack and easily damaged in transit. Travel-friendly alternatives include short-handled brushes or collapsible travel brushes, where the handle unscrews and reverses to form a protective hollow cap over the delicate bristles. Another popular option for quick sketching is the water brush, which features a squeezable plastic handle filled with water. While water brushes are incredibly convenient because they eliminate the need for a separate water cup, they offer less control over the water-to-pigment ratio compared to traditional brushes.
Managing your water supply efficiently is crucial when you do not have access to a clean water source. A collapsible silicone water cup is an excellent addition to any travel kit, as it folds completely flat when not in use and provides a stable, slip-resistant base on uneven ground. For longer sessions, a dual-chamber container allows you to keep one side for dirty water to rinse your brushes and the other side for clean water to mix fresh washes. Always carry a small sponge, a microfiber cloth, or a reusable cotton rag; these are indispensable for wiping excess moisture from your brush, cleaning your mixing wells, and controlling the exact wetness of your paper.
Picking the Right Paper and Stabilizing Accessories
The paper you choose can make or break your plein air experience. For travel, watercolor blocks are highly recommended over loose sheets of paper. A watercolor block consists of a stack of paper that is glued on all four sides, with only a small opening left unglued. This design keeps the top sheet perfectly taut, preventing the paper from buckling or warping when you apply heavy wet washes. Once dry, you slide a plastic card or palette knife into the unglued gap to release the top sheet, revealing a fresh page underneath. This eliminates the need to carry heavy drawing boards, masking tape, or water-resistant backing boards.
If you prefer using loose sheets of paper or a watercolor sketchbook, you will need a lightweight, rigid backing board to support your work. A piece of corrugated plastic, a thin sheet of acrylic, or a lightweight plywood board works beautifully. You can secure your paper to the board using heavy-duty binder clips or artist-grade masking tape. Binder clips are particularly useful in outdoor settings, as they prevent your paper from flapping wildly in sudden gusts of wind.
When selecting paper, pay close attention to the weight and texture specified on the cover. For watercolor painting, a minimum weight of 300 gsm (140 lb) is the standard. Lighter papers will warp, buckle, and pool water excessively, leading to frustrating puddles that take too long to dry in humid air. Cold-pressed paper offers a versatile, slightly textured surface that handles both wet-on-wet washes and dry brush details beautifully. If you plan to do highly detailed line work or ink-and-wash drawings, hot-pressed paper provides a completely smooth surface that is ideal for fine-liner pens.
To complete your paper setup, pack a few small but crucial stabilizing accessories. A simple graphite pencil (such as an HB or 2B) is essential for mapping out your initial composition before applying paint. A kneaded eraser is ideal for travel because it can be shaped to erase tiny details and does not leave messy eraser crumbs behind. Finally, a roll of low-tack masking tape can help you create clean, crisp white borders around your paintings, giving your outdoor sketches a polished, professional look.
Packing and Organizing Your Kit for the Field
Once you have selected your individual components, the final step is organizing them into a cohesive, easy-to-carry system. The goal is to protect your delicate art supplies from damage while ensuring that everything is instantly accessible when you find the perfect painting spot. A small, zippered utility pouch, a heavy-duty canvas pencil case, or a dedicated brush roll are all excellent options for keeping your tools organized. Grouping items by function makes it easy to find what you need without rummaging through a cluttered bag.
Protecting your supplies from the elements is especially important when painting outdoors. To prevent accidental leaks, always wrap your watercolor tin in a small plastic bag or a microfiber cloth before packing it away. This simple step ensures that any residual water left in the mixing wells does not seep out and ruin your paper or bag interior. Never pack wet brushes loose in your bag; if the delicate bristles are bent or crushed during transit, they may lose their shape permanently. Always use protective plastic caps, a dedicated brush roll, or collapsible travel brushes to keep the tips safe.
In humid or tropical regions, protecting your paper from moisture is a constant battle. High humidity can soften the sizing in watercolor paper, altering how it absorbs paint and making it more prone to tearing. To keep your paper pristine, store your watercolor blocks or sketchbooks inside a resealable, airtight plastic bag when you are not actively painting. This simple barrier protects your paper from ambient humidity, sweat, and sudden tropical downpours.
Finally, consider how you will physically hold and use your kit while painting. Your entire setup should be compact and balanced enough to hold comfortably on your lap, a portable folding stool, or a small travel easel. If you have to balance a heavy palette, a loose water cup, and a flapping sheet of paper all at once, you are much more likely to drop your supplies into the dirt or sand. By keeping your kit integrated and lightweight, you can paint comfortably for hours, capturing the beauty of the world around you with ease and confidence.
Frequently Asked Questions (FAQ)
How do I clean and dry my travel palette after an outdoor session?
To clean your travel palette after painting outdoors, use a damp sponge, microfiber cloth, or paper towel to gently wipe away excess pigment from the mixing wells. Avoid rinsing the entire palette under a running tap, as this can wash away the dry paint stored in your half-pans. Once the mixing surfaces are clean, leave the palette open in a well-ventilated indoor area until all the paint pans and mixing wells are completely dry to the touch. Closing a wet palette traps moisture inside, which can lead to mold growth and ruin your pigments, especially in warm, humid climates.
Can I use regular tap water for plein air watercolor painting?
Yes, standard tap water or bottled drinking water is perfectly suitable for plein air watercolor painting. However, you should avoid using water collected directly from natural outdoor sources like rivers, lakes, ponds, or the sea. Natural water often contains microscopic organic matter, algae, salt, or minerals that can react chemically with your watercolor pigments, causing unexpected color shifts, poor paint flow, or mold growth on your paper over time. Always carry a small, dedicated bottle of clean tap or bottled water in your kit specifically for mixing your paints.

Community discussion
Share your experience or ask a question. Comments are reviewed before publication.