
Starting your jewelry-making journey is an exciting creative outlet, but your success depends heavily on the first set of materials you buy. A beginner-friendly beaded bracelet making kit must prioritize ease of assembly, clear learning resources, and organized storage. Specifically, look for kits containing beads with generous hole diameters (at least 1mm to 2mm), high-stretch elastic cord that eliminates the need for complex metal clasps, basic hand tools (such as sharp crafting scissors and a bead mat), step-by-step visual instructions, and a secure, compartmentalized storage container.
In the Philippines, where high humidity and warm temperatures are a constant, choosing a kit with durable, sweat-resistant materials is especially important. Low-quality elastic threads can degrade quickly under tropical conditions, and cheap metal findings may tarnish within weeks. By focusing on the right combination of bead sizes, stringing materials, and educational resources, you can avoid common frustrations and create beautiful, lasting bracelets right from your first try.
Evaluating Bead Types, Sizes, and Hole Diameters
The type of beads included in your kit determines both the look of your finished jewelry and how easy it is to make. For absolute beginners, lightweight and highly forgiving materials like acrylic, polymer clay (heishi), and wood are excellent choices. They are comfortable to wear in warm weather, highly durable, and easy to handle. In contrast, heavy natural gemstones or tiny glass seed beads require precise motor skills and specialized needles, which can quickly lead to hand fatigue and frustration.
Products mentioned in this guide
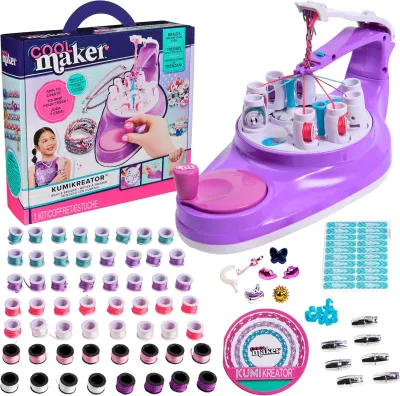
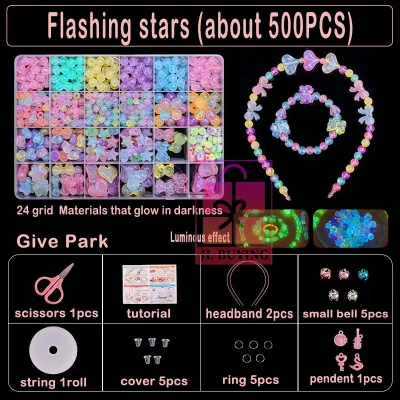
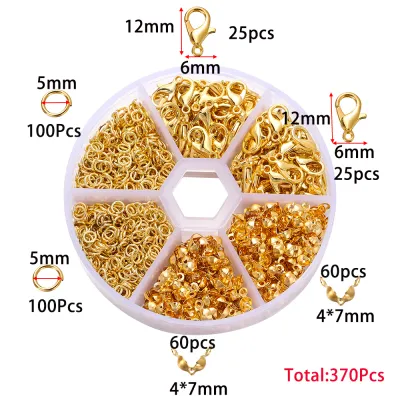
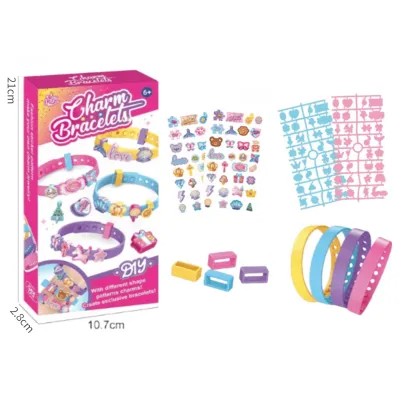
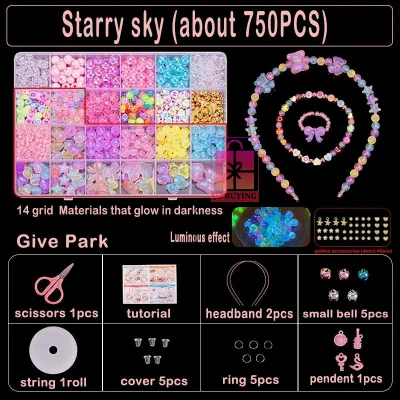
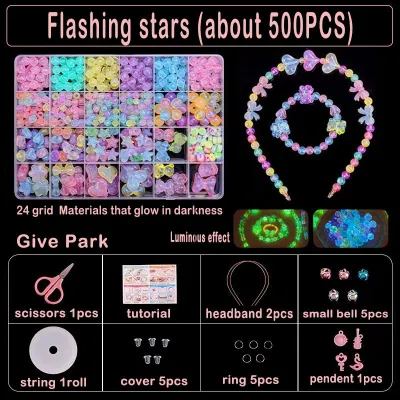
Prices are valid at publication and may change. Please refer to the product page for the latest price.
Hole size is perhaps the most critical technical specification to check before purchasing. Look for kits that feature beads with a hole diameter of 1.5mm to 2mm. This generous size allows you to thread your cord through the bead multiple times without the material fraying or getting stuck. When a bead hole is too narrow—often less than 0.8mm—threading becomes a tedious chore that requires a needle threader and a lot of patience.
Bead shape also plays a major role in the learning curve. Symmetrical shapes, such as classic round beads, rondelles, or uniform tube beads, are highly recommended for your first projects. These shapes align naturally on a string without requiring a specific orientation. Irregular, top-drilled, or highly complex geometric shapes require precise spacing and balancing to sit flat against the wrist, which adds unnecessary complexity when you are still mastering basic stringing techniques.
To ensure a smooth crafting experience, verify the bead dimensions listed in the product description. A beginner-friendly sweet spot is a bead diameter of 6mm to 8mm paired with a hole size of at least 1.2mm. This size is large enough to hold comfortably between your fingers while still creating a delicate, wearable bracelet. Avoid kits that consist entirely of micro-sized beads unless you are specifically looking to learn advanced weaving techniques.
Assessing Stringing Materials and Essential Tools
The stringing material is the backbone of your bracelet, and your choice here dictates the entire construction process. Elastic cord is the absolute best option for complete beginners because it eliminates the need for metal clasps, jump rings, or crimp beads. You simply thread the beads, tie a secure knot, and stretch the bracelet over your hand. When evaluating kits, look for polyurethane (TPU) elastic thread rather than cheap rubber-based cords, as TPU offers superior stretch recovery and resists degradation from sweat and humidity.

If you want to learn traditional jewelry-making techniques, look for kits that feature non-stretch beading wire or nylon thread. Beading wire, such as nylon-coated stainless steel, provides a highly professional finish and drape but requires metal findings to secure. This means the kit must include lobster clasps, jump rings, and crimp beads. If you choose this path, verify that the kit includes a dedicated guide on how to compress crimp beads, as an improperly secured crimp will cause the entire bracelet to unravel.
Beyond the stringing material, the tools included in the kit can make or break your crafting session. A high-quality kit should include a pair of sharp, dedicated crafting scissors or flush cutters. Standard household scissors often crush elastic cord rather than cutting it cleanly, leaving frayed ends that are nearly impossible to thread through small bead holes. If the kit is wire-based, a pair of chain-nose pliers is essential for closing jump rings and flattening crimp beads.
Another invaluable tool to look for is a bead mat or a flocked bead tray. This simple, soft-textured fabric mat prevents round beads from rolling off your table or desk and getting lost on the floor. It also allows you to lay out your entire design and arrange patterns before you begin stringing, saving you time and preventing mistakes.
The Role of Clear Instructions and Proper Storage
A massive collection of beautiful beads is of little use if you do not know how to secure them. Many low-quality kits only provide a picture of the finished product on the box, leaving beginners to guess how to tie off the thread. Look for kits that offer comprehensive, step-by-step visual instructions, color-coded diagrams, or QR codes that link directly to video tutorials.
The instructions must explicitly cover how to tie a secure knot, such as a surgeon’s knot or a double-overhand knot, which are essential for keeping elastic bracelets intact. A good tutorial will also show you how to hide the finished knot inside an adjacent bead with a larger hole, giving your handmade jewelry a clean, professional appearance. Without these fundamental techniques, your bracelets are highly likely to come undone when stretched.
The physical box housing your kit is just as important as the materials inside. A high-quality kit comes in a sturdy, clear plastic organizer with tight-fitting, compartmentalized sections. Adjustable dividers are highly beneficial because they allow you to customize the space as your bead collection grows.
Before buying, pay close attention to user reviews regarding the storage box lid. If the lid does not seal flush against the internal dividers, beads will inevitably migrate between compartments during transit or storage. Opening a kit only to find thousands of tiny beads mixed together is incredibly discouraging and requires hours of tedious sorting before you can even begin crafting.
Self-Check: Which Kit Style Matches Your Crafting Goals?
To find the perfect kit, you need to match the product’s contents with your personal crafting goals. In the Philippine market, beginner kits typically range in price from around ‛150 for basic elastic sets to over ‛800 for comprehensive kits with metal tools and glass beads. Use this quick self-assessment to identify which category fits your needs:
Simple and Stretchy Creations
If your goal is to make fun, colorful, and easy-to-wear bracelets quickly, look for an elastic-based kit. These kits should be heavy on polymer clay (heishi) beads, colorful acrylic beads, and wooden beads, paired with 0.8mm or 1.0mm elastic cord. They do not require any pliers or metal findings, making them perfect for a relaxing weekend activity or a family crafting session.
Classic and Professional Jewelry
If you want to learn the fundamentals of traditional jewelry making and create pieces that look like they were bought from a boutique, prioritize a wire-based kit. Look for options that include glass pearls, gemstone beads, metal spacer beads, beading wire, lobster clasps, and a basic set of jewelry pliers. This style of kit teaches you how to work with hardware and construct durable, high-end pieces.
Intricate Bead Weaving
If you are drawn to highly detailed, woven patterns or friendship-style bracelets, you will need a seed bead kit. These kits feature tiny glass seed beads (usually size 8/0 or 11/0), fine beading needles, and strong nylon thread. Some may even include a basic bead loom. This path requires a high level of patience and fine motor skills, but it allows you to create incredibly detailed geometric patterns.
Always check the kit’s product gallery and listed contents to ensure the included materials actually support the specific styles you want to create. Taking a few minutes to verify these details will ensure your first experience with bead crafting is both successful and highly rewarding.
Frequently Asked Questions (FAQ)
How many beads do I need to make one adult bracelet?
An average adult wrist size ranges from 15 to 18 centimeters. To estimate the number of beads you will need, divide your desired bracelet length by the diameter of the beads. For example, if you are using 8mm beads to make a 160mm (16cm) bracelet, you will need approximately 20 beads. If you plan to add metal spacer beads or charms, the required number of main beads will decrease. It is always best to add two or three extra beads to your calculation to ensure a comfortable, slightly loose fit that does not pinch the skin.
Can I use regular household scissors instead of crafting scissors?
While you can use household scissors in a pinch, they are generally not recommended for jewelry making. Standard household scissors tend to crush and fray elastic cord rather than cutting it cleanly, which makes threading the cord through small bead holes incredibly difficult. Furthermore, if your kit includes metal wire, using household scissors to cut it will permanently dull and damage the blades. Investing in a dedicated, sharp pair of crafting scissors or flush cutters will save you time and preserve your household tools.

Community discussion
Share your experience or ask a question. Comments are reviewed before publication.