
A complete bead set kit for beginners should provide a balanced mix of versatile beads, essential hand tools, and reliable stringing materials to support foundational jewelry-making projects. Rather than focusing solely on the total piece count, a well-designed starter kit prioritizes functional variety, ensuring you have the correct findings to finish a piece and the right tools to assemble it safely. This guide breaks down the exact components you should verify before purchasing a kit, helping you distinguish between comprehensive starter sets and those filled with unusable filler items.
When starting out, it is easy to be enticed by kits boasting tens of thousands of pieces. However, if those pieces consist almost entirely of microscopic seed beads without any clasps, wire, or pliers, you will find yourself unable to complete a single wearable piece of jewelry. A truly beginner-friendly kit acts as a self-contained workstation, providing a clear path from a loose pile of materials to a finished, secure accessory.
Essential Beads and Findings for Starter Projects
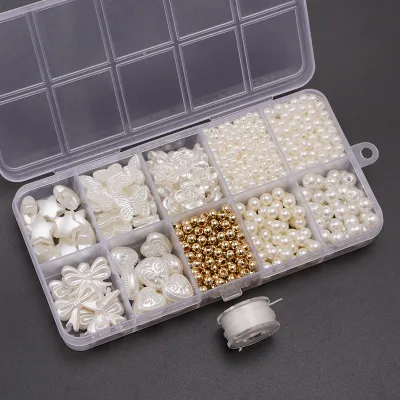
The core of any bead set kit is the beads themselves, but their utility depends heavily on variety and the inclusion of matching metal findings. A well-rounded starter kit should feature a thoughtful assortment of bead shapes and sizes. Look for kits that include larger focal beads (such as 6mm or 8mm round beads), smaller spacer beads to place between them, and a manageable selection of seed beads (ideally size 8/0 or 6/0, which are much easier for beginners to thread than tiny size 11/0 beads). This structural variety allows you to practice different spacing, weight distribution, and design patterns.
Products mentioned in this guide
![[Free Gift] 5000 Pcs beads for bracelet making set beads set kit with tools diy bracelet kit set beads accessories kit set with lock beads set kit complete bravelet making set](https://img.lazcdn.com/g/p/924b5012c03ea19460b1c189336c0dd0.jpg_400x400q80.jpg_.webp)
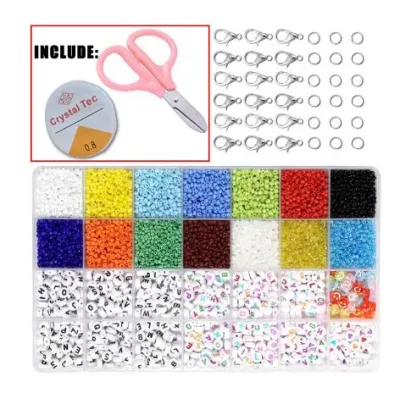
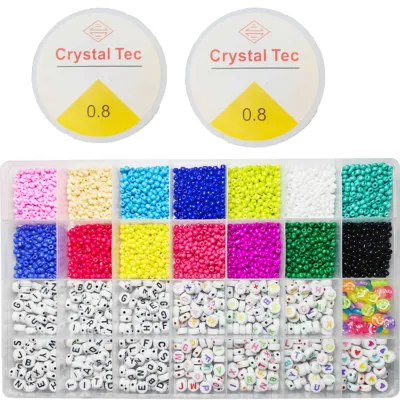
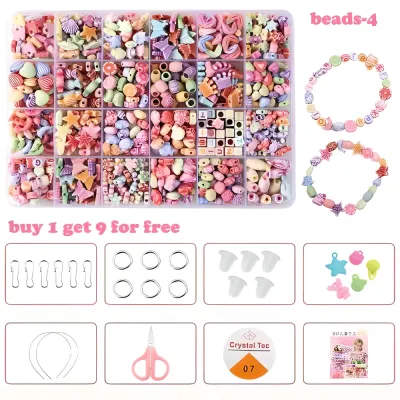
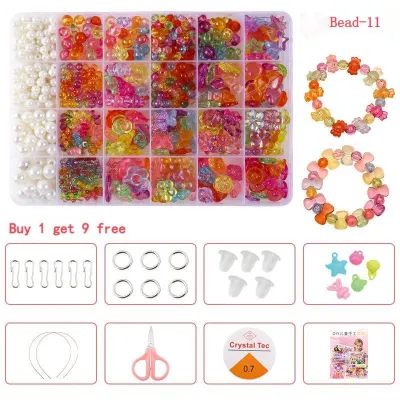

Prices are valid at publication and may change. Please refer to the product page for the latest price.
Equally important are the findings—the metal components used to connect, finish, and secure your jewelry. A complete kit must include basic findings such as open jump rings, clasps (such as user-friendly lobster claws or toggle clasps), and crimp beads. Without these finishing elements, you cannot complete non-stretch necklaces or bracelets. In warm, humid climates like the Philippines, base metal findings can tarnish quickly when exposed to moisture and skin oils. It is wise to check product descriptions to see if the findings are made of brass, iron, or stainless steel, as these materials offer better resistance to the elements.
Before purchasing, always verify the compatibility between the bead hole sizes and the stringing materials provided. A common frustration for beginners is discovering that the included wire or elastic is too thick to pass through the holes of the beads. Reliable kits will explicitly state the bead hole diameters (typically ranging from 0.5mm to 1mm) and match them to the gauge of the included stringing mediums.
Must-Have Tools for Basic Jewelry Making
While some basic stretch bracelets can be made without specialized equipment, working with wire, clasps, and headpins requires a dedicated set of hand tools. A complete beginner kit should include a core set of three essential pliers: chain-nose pliers, round-nose pliers, and flush cutters. Each of these tools serves a distinct, non-negotiable purpose in the assembly process.

Chain-nose pliers feature flat jaws that taper to a fine point, making them indispensable for gripping small components, opening and closing jump rings cleanly, and tucking away sharp wire ends. Round-nose pliers have smooth, conical jaws used exclusively for bending wire into perfect loops, which are necessary for attaching clasps or creating custom dangles. Flush cutters are designed with a flat exterior side, allowing you to cut wire incredibly close to beads or findings, leaving a smooth, safe edge that will not scratch the wearer.
When evaluating the tools in a kit, prioritize safety and ergonomics. Look for pliers with non-slip rubber or foam grips, which prevent slipping when working with delicate components, especially in warm weather. Crucially, ensure the pliers have smooth inner jaws. Household pliers often have serrated teeth that will scratch, mar, or strip the protective nylon coating off jewelry wire and findings, leading to weak spots and rapid tarnishing. Additionally, check that the scale of the tools matches the materials; miniature pliers are ideal for the fine-gauge wire and small findings typically found in starter sets.
To keep your workspace organized, look for kits that include a soft bead mat or a molded plastic design board. A bead mat prevents tiny spheres from rolling off your table and onto the floor, while a design board allows you to lay out and measure your patterns before committing them to wire.
Stringing Materials and Wire Options
The longevity of your handmade jewelry depends entirely on the quality and suitability of the stringing materials. A comprehensive starter kit should offer multiple stringing options to accommodate different project types, such as bracelets, necklaces, and earrings.
For structured jewelry like necklaces and non-stretch bracelets, nylon-coated stainless steel beading wire is the industry standard. This material combines the strength of steel with a smooth, protective coating that prevents friction against the bead holes. When checking a kit’s specifications, look for the strand count of the wire; 7-strand wire is highly common in beginner kits because it is budget-friendly and holds its shape well, while 19-strand wire offers a softer, more natural drape.
For quick, clasp-free projects, elastic cord is a must-have. A good kit should include a high-quality polyurethane stretch cord with a thickness of 0.7mm or 0.8mm, which is strong enough to withstand daily wear while remaining thin enough to hide knots inside standard bead holes. Avoid kits that bundle cheap, fabric-covered sewing elastic, as this material frays rapidly and lacks the tension recovery needed for durable jewelry.
Finally, for creating earrings, charms, and dangles, the kit should include a selection of headpins and eyepins. Headpins have a flat stopper at one end to keep beads from sliding off, while eyepins feature a pre-formed loop at one end for linking components together. Ensure the pin length (usually 1 to 2 inches) and gauge (typically 20 to 24 gauge) are compatible with the bead sizes provided in the kit.
Storage and Organization Basics
Jewelry making involves hundreds of tiny, easily lost components, making proper storage an absolute necessity rather than an afterthought. A high-quality bead set kit should arrive in a durable, compartmentalized plastic storage box.
Look for boxes featuring secure, double-latch closures to prevent accidental spills during transport. Adjustable or removable dividers are highly beneficial, as they allow you to customize the compartment sizes to accommodate longer tools, spools of wire, or larger focal beads. If the dividers are loose or poorly fitted, tiny seed beads and crimp tubes can easily slide underneath them, resulting in a frustratingly mixed mess.
To prevent this, well-designed kits often include small, individual sealable zip-top bags or screw-top plastic vials specifically for securing microscopic findings like crimp beads, jump rings, and clasps. This multi-layered storage approach keeps your most critical finishing pieces safe and easy to locate.
As your skills develop and your collection expands, the initial kit box may become crowded. A good starter kit should serve as a solid foundation for this growth. You can maintain long-term organization by using masking tape or a label maker to mark each compartment with the specific bead size, material, or wire gauge, making it simple to know exactly what to reorder when your supplies run low.
How to Evaluate a Pre-Made Kit vs. Building Your Own
When deciding whether to purchase a pre-made bead set kit or assemble your own collection from scratch, you must weigh convenience and cost against customization and material quality. For absolute beginners, a pre-made kit is almost always the most practical choice, offering a curated selection of matching components at a lower upfront cost than buying individual spools, tool sets, and bead packs.
To ensure you are getting genuine value, calculate the cost-per-component ratio and watch out for common marketing traps. A kit advertised with “10,000 pieces” for a low price might seem like an incredible bargain, but if 9,950 of those pieces are low-quality plastic seed beads and the kit lacks pliers or clasps, you will end up spending more money sourcing those missing essentials separately. A high-value kit will have a balanced ratio, perhaps offering 1,000 beads alongside a full set of three pliers, multiple wire options, and a generous assortment of findings.
Another critical factor is the quality of the included instructions. A reliable beginner kit should feature a clear, illustrated project guide or a direct link to step-by-step video tutorials. Verify that these instructions actually utilize the exact tools, wire gauges, and findings included in the box, rather than offering generic advice that does not apply to your specific materials.
If you have a highly specific project in mind—such as making only sterling silver earrings or working exclusively with natural gemstones—building your own kit by sourcing individual components from specialized arts and crafts retailers is the better path. This prevents waste and ensures every peso is spent on materials you will actually use. However, for those looking to explore the craft, test different techniques, and enjoy a seamless unboxing experience, a well-vetted, comprehensive pre-made kit remains the gold standard.
Frequently Asked Questions (FAQ)
Are glass or acrylic beads better for a first kit?
Acrylic beads are lightweight, highly durable, and virtually shatterproof, making them incredibly forgiving for beginners practicing basic stringing and knotting techniques. They are also highly cost-effective, allowing kits to offer a wider variety of colors and shapes. Glass beads, on the other hand, offer a more substantial weight, a cooler feel against the skin, and a classic glossy finish, but they can chip or break if dropped on hard surfaces. When shopping, check the product description carefully; high-quality kits will explicitly state whether the beads are acrylic, glass, or a specific mixture, allowing you to set realistic expectations for your projects.
What size crimp beads and wire should a starter kit include?
A standard beginner kit typically includes beading wire with a diameter of approximately 0.38mm to 0.45mm (0.015 to 0.018 inches), which fits most medium-hole glass and acrylic beads. To secure this wire, the kit should include 2mm crimp tubes or crimp beads. The inner diameter of a 2mm crimp tube is perfectly sized to accommodate two passes of 0.38mm wire before it is compressed. Beginners should always test their crimp connections on a scrap piece of wire, pulling firmly to ensure the connection holds, before finalizing their actual jewelry pieces.

Community discussion
Share your experience or ask a question. Comments are reviewed before publication.