
Stepping into the world of jewelry making is an exciting creative milestone, but purchasing your first diy beads set is the most critical step in determining whether your new hobby feels like a joy or a chore. A common mistake for beginners is buying a set based solely on the colors of the beads, only to discover mid-project that they lack the structural hardware to finish a bracelet, or that their tools are too clumsy to close a simple loop. A truly beginner-friendly kit should serve as a self-contained ecosystem, providing not just the decorative elements but also the specialized stringing materials, durable findings, and ergonomic tools required to transform loose components into wearable art.
To make an informed purchase, you must look beyond the surface appeal of the beads and evaluate the technical specifications of the entire kit. This guide breaks down the essential components of a starter set, explains how to assess the physical quality of the materials, and matches different kit types to your specific crafting goals so you can start creating with confidence.
Essential Components Every Beginner DIY Beads Set Should Include
A comprehensive starter kit must eliminate the need for immediate trips to a specialty craft store. If you have to buy extra wire, clasps, or pliers just to complete your very first project, the kit has failed to serve its purpose as a true starter set. Before clicking buy, verify that the set contains a balanced mix of the following four core categories.
Products mentioned in this guide
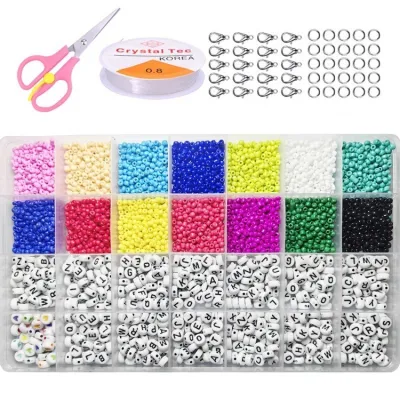
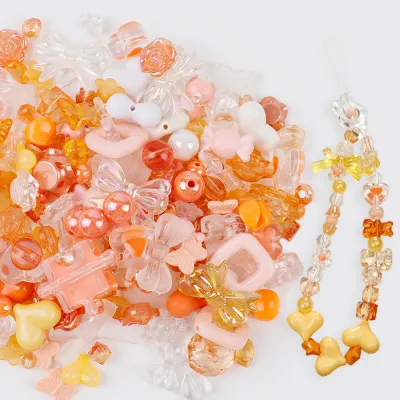
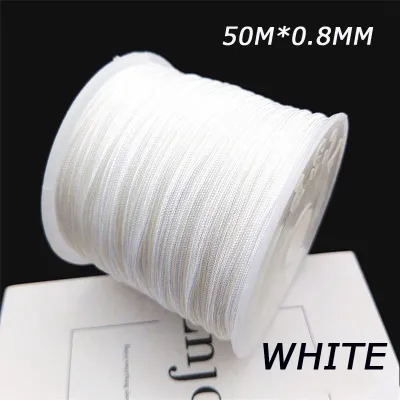
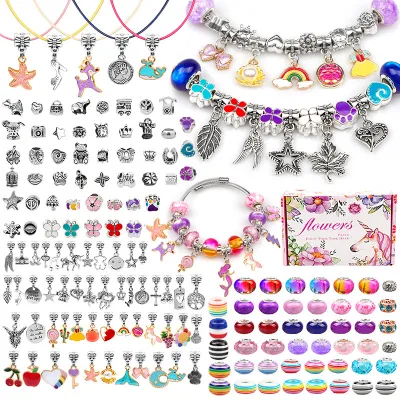
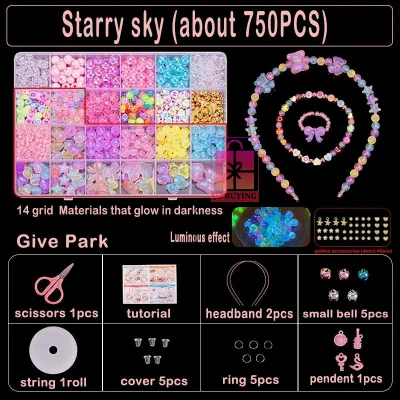
Prices are valid at publication and may change. Please refer to the product page for the latest price.
Beads Assortment
Your starter kit should offer a diverse palette of sizes, shapes, and colors to help you understand design proportions and weight distribution. Look for a set that includes a range of bead diameters, typically from small 4mm accent beads to larger 8mm or 10mm focal beads. Having a variety of shapes—such as classic rounds, faceted rondelles, and tubular spacer beads—allows you to experiment with texture and light reflection, which keeps your early designs from looking flat or monotonous.
Stringing Materials
Different jewelry projects require entirely different structural foundations, and a versatile kit should provide at least two distinct types of stringing materials.
- Elastic Cord: This is the absolute easiest material for absolute beginners. Usually made of stretchy polyurethane, a good elastic cord (ideally 0.7mm to 0.8mm in thickness) allows you to create quick, clasp-free stretch bracelets.
- Beading Wire: For structured, heavy, or elegant necklaces and bracelets, you need nylon-coated miniature stainless steel cable (often referred to as tiger tail). This wire does not stretch, provides a graceful drape, and requires metal findings to secure.
- Nylon Thread: Essential for bead weaving, embroidery, or creating delicate knotted pearl-style jewelry, nylon thread offers maximum flexibility but requires a needle to thread through tiny bead holes.
Findings and Hardware
Findings are the metal components that hold your jewelry together and allow you to wear it. A complete beginner set must include a generous assortment of these structural elements:
- Clasps: Look for lobster claw clasps or toggle clasps, which are the easiest for beginners to manipulate and install.
- Jump Rings: These small, open metal loops act as connectors between your stringing material, clasps, and charms.
- Crimp Beads: Tiny, soft metal tubes or beads that you crush with pliers to anchor your beading wire to a clasp.
- Bead Tips (Clamshells): These clever metal covers hide ugly knots or crimp beads, providing a polished, professional finish to your thread or wire ends.
Basic Tools
While you can string beads with your bare hands, you cannot finish jewelry securely without specialized hand tools. Avoid kits that omit tools entirely; instead, seek out sets that bundle the three non-negotiable jewelry pliers. Round-nose pliers are essential for shaping smooth wire loops and wrapping headpins. Chain-nose pliers (which have flat jaws) are necessary for gripping small components, opening and closing jump rings, and flattening crimp beads. Flush wire cutters are required to make clean, close snips on beading wire and headpins without leaving sharp, scratchy edges. Finally, a soft fabric bead mat is an invaluable addition, as its textured surface prevents round beads from rolling off your table and onto the floor while you work.
How to Evaluate Bead Quality and Tool Durability
Not all crafting kits are created equal. Cheaply manufactured sets often lead to immense frustration, resulting in split cords, broken bead tips, or hand fatigue from poorly designed pliers. Knowing how to read product descriptions and user reviews for specific quality indicators will save you time, money, and creative disappointment.

Hole Size and Consistency
One of the most common issues in low-quality bead sets is inconsistent drilling. If the holes inside the beads are off-center, too small, or clogged with manufacturing debris, you will struggle to pass your stringing material through them. Look for listings that explicitly state the inner hole diameter (for example, a 1mm hole size is standard and highly versatile). Read user feedback to ensure that the beads do not suffer from sharp internal edges, which can easily slice through elastic cords or nylon threads over time.
Material Finish and Weight
The material of the beads dictates how the finished jewelry feels against the skin, how it drapes, and how long it lasts.
- Glass Beads: These offer a satisfying, heavy weight and a premium feel. They catch the light beautifully and drape elegantly around the neck or wrist, though they can chip if dropped on hard tile floors.
- Acrylic Beads: Exceptionally lightweight and highly affordable, acrylic is perfect for chunky statement pieces or long, multi-layered necklaces that would otherwise feel too heavy. However, cheap acrylic can sometimes feature visible seam lines from the molding process.
- Wooden Beads: These provide an organic, matte, and highly tactile experience. They are incredibly lightweight but must be checked to ensure their inner holes are sanded smooth to prevent splintering your thread.
Tool Joint and Grip Quality
When evaluating the pliers included in a starter kit, pay close attention to the joint construction. High-quality pliers utilize a box joint or a smooth lap joint with a built-in leaf spring. The spring mechanism automatically coaxes the handles back open after each squeeze, which dramatically reduces hand strain during repetitive tasks. Avoid pliers with rough, unpolished joints that grind when closed, and opt for handles coated in double-dipped rubber or ergonomic foam for a comfortable, non-slip grip.
Environmental Durability
If you are crafting and storing your supplies in a humid, tropical climate like the Philippines, environmental durability is a massive factor. High humidity accelerates the oxidation of cheap iron-based metals, causing your clasps, jump rings, and tools to rust or turn an unsightly green. To protect your investment, look for kits that feature stainless steel, brass, or tarnish-resistant plated findings. Your pliers should also feature a rust-resistant black oxide or polished finish to prevent the metal from degrading during the rainy season.
Top Types of DIY Beads Sets for Different Beginner Goals
Because jewelry making encompasses a vast array of styles, there is no single “perfect” kit for everyone. Matching your purchase to your specific design interests ensures you do not waste money on materials you will never use.
Comprehensive Glass and Crystal Bead Sets
These kits are designed for crafters who want to create elegant, classic, and sophisticated jewelry pieces that look like they were purchased from a boutique.
- Target Audience: Beginners interested in making delicate bracelets, drop earrings, formal necklaces, and basic wire-wrapped pendants.
- What to Look For: High-quality faceted glass rondelles, glass pearls, jewelry-grade copper wire, headpins, ear wires, and sturdy stainless steel clasps.
- Limitations: Glass beads are heavier and more fragile than plastic alternatives. Additionally, mastering wire wrapping and loop-making with pliers requires a steeper initial learning curve than simple elastic stringing.
Acrylic, Clay, and Letter Bead Kits
These sets focus on bright colors, playful patterns, and personalized designs. They are incredibly popular for casual, everyday wear and social crafting.
- Target Audience: Crafters looking to make trendy friendship bracelets, personalized name jewelry, phone charms, or those planning craft activities with children.
- What to Look For: Lightweight polymer clay heishi discs, colorful acrylic beads, a wide selection of alphabet letter beads, and a generous spool of 0.8mm elastic cord.
- Limitations: The finished pieces have a distinctly casual, youthful aesthetic that may not appeal to those wanting high-end jewelry. Furthermore, securing elastic cord requires specific knotting techniques to prevent the bracelet from untying during daily wear.
Seed Bead and Weaving Kits
Seed bead kits are designed for highly detailed, intricate, and geometric work. They require patience and precision but offer unmatched creative freedom.
- Target Audience: Patient beginners who enjoy meditative, time-consuming projects, intricate patterns, and detailed bead embroidery.
- What to Look For: Uniformly sized glass seed beads (ideally size 8/0 or 11/0 to make stringing easier for beginners), ultra-fine beading needles, strong nylon beading thread, and a compact bead loom.
- Limitations: Working with beads that are only a few millimeters wide requires excellent eyesight, steady hands, and fine motor skills. It takes significantly longer to complete a single project compared to working with larger beads.
Quick Comparison of Starter Bead Kits
To help you quickly identify which path aligns with your creative goals, this table compares the three primary starter kit categories across key practical dimensions.
| Set Type | Ideal Project | Primary Stringing Material | Learning Curve | Best For |
|---|---|---|---|---|
| Glass & Crystal | Elegant necklaces, drop earrings, wire pendants | Beading wire & metal headpins | Moderate (requires plier techniques) | Boutique-style, formal jewelry |
| Acrylic, Clay & Letter | Friendship bracelets, name charms, phone straps | Elastic cord | Low (simple stringing & knotting) | Casual gifts, kids' crafts, quick projects |
| Seed Bead & Weaving | Intricate patterns, woven bands, bead embroidery | Fine nylon thread & needles | High (requires patience & precision) | Detailed geometric designs & loom work |
How to Store and Protect Your Beads and Tools
Once you purchase your starter kit, proper maintenance and storage are vital to keep your materials organized and prevent your tools and findings from degrading.
Compartmentalized Storage
Never underestimate the chaos of a spilled bead box. Opt for a kit that comes in a sturdy, latched plastic organizer with adjustable dividers. Keeping your beads meticulously separated by color, size, and type saves you hours of sorting time. Ensure the lid fits completely flush against the top of the inner dividers; otherwise, tiny seed beads or jump rings will migrate into adjacent compartments whenever the box is moved or stored vertically.
Protecting Metal Findings
To combat the high humidity of the Philippines, you must take active steps to prevent your metal findings from tarnishing. Store your clasps, headpins, and jump rings in small, airtight zip-top plastic bags inside your main organizer. Drop a small silica gel packet (the kind often found in shoe boxes) or a specialized anti-tarnish strip into each bag to absorb residual moisture and airborne pollutants, keeping your metal components bright, shiny, and rust-free.
Caring for Elastic and Thread
Elastic cord and nylon threads are highly sensitive to environmental factors. Prolonged exposure to direct sunlight (UV rays) and high ambient heat will dry out polyurethane elastic, causing it to lose its stretch, become brittle, and snap unexpectedly. Always store your spools of stringing materials in a cool, dark drawer or cupboard rather than leaving them exposed on a sunny crafting desk.
Frequently Asked Questions (FAQ)
How many beads do I need to make a standard bracelet?
To estimate the number of beads you need, divide your target wrist circumference by the diameter of the beads you plan to use. For example, an average adult wrist circumference is approximately 170 millimeters. If you are using standard 8mm beads, you will need about 21 beads to complete the bracelet (170 divided by 8 equals 21.25). If you are adding spacer beads, metal charms, or a clasp, you can subtract one or two beads from this total to ensure a comfortable, slightly loose fit.
Can I use regular sewing thread instead of specialized beading cord?
No, regular sewing thread is highly unsuitable for jewelry making. It lacks the necessary tensile strength to support the weight of glass, metal, or clay beads, and it will quickly snap under minimal tension. Furthermore, the interior edges of bead holes—especially those in glass, ceramic, or metal beads—can be incredibly abrasive. Specialized beading cords and nylon threads are engineered specifically to resist this friction, whereas standard cotton or polyester sewing thread will fray and break almost immediately.
What is the best way to finish an elastic bead bracelet so it won't break?
The most secure way to tie off an elastic bracelet is by using a surgeon’s knot, which is essentially a standard square knot with an extra pass through the loop for added friction. Once you pull the knot firmly from all four strands to lock it in place, apply a tiny drop of flexible jewelry glue (such as GS Hypo Cement or E6000) directly onto the knot. Let the glue dry completely, and then slide one of the adjacent beads over the wet knot so that it dries safely hidden inside the bead’s inner hole, protecting the knot from rubbing against your wrist.

Community discussion
Share your experience or ask a question. Comments are reviewed before publication.