
Finding the perfect customized stickers for bullet journaling in the Philippines involves choosing between three primary channels: local commercial print shops, online print-on-demand platforms, and independent stationery creators on local e-commerce marketplaces. The ideal sourcing method depends heavily on your specific project goals, including your desired order volume, budget, paper texture preferences, and turnaround time.
For high-volume projects or bulk designs, local commercial print shops offer cost-effective sheet rates and rapid local courier delivery. If you are looking for low minimum order quantities, specialized writable papers, and a highly personalized ordering experience, independent creators on online marketplaces are the most accessible choice. Understanding how to navigate these channels and prepare your digital files will ensure you receive high-quality, functional stickers that integrate beautifully into your daily planner layouts.
Key Specifications for Bullet Journal Stickers
Before contacting a printer, defining your exact sticker requirements is essential to avoid material and usability issues that can disrupt your journaling routine.
Products mentioned in this guide
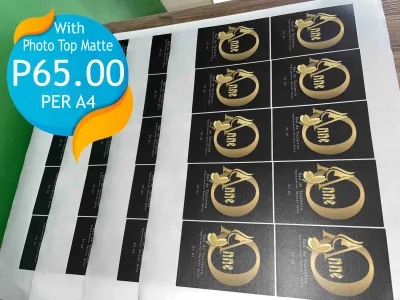
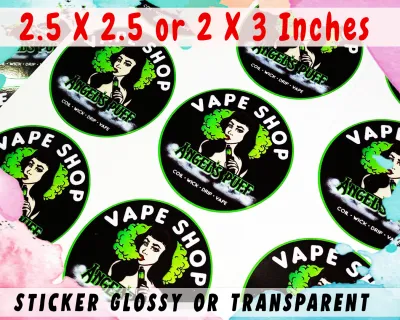
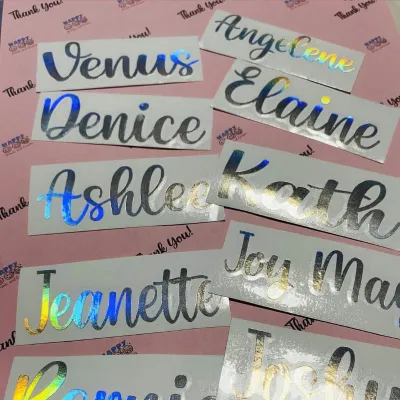
Prices are valid at publication and may change. Please refer to the product page for the latest price.
Material Choices
Bullet journaling requires materials that integrate seamlessly with notebook pages without adding excessive bulk. Standard uncoated wood-free matte sticker paper is the gold standard for planners. It features a toothy, paper-like texture that accepts gel pens, ballpoint pens, and water-based brush markers without smearing or bleeding. The ink absorbs quickly, mimicking the native paper of your journal and allowing you to write directly on the sticker as soon as it is applied.
In contrast, glossy paper and vinyl options present significant challenges for daily writing. Vinyl is inherently plastic-based and non-porous, meaning water-based inks will bead up, smear, or transfer to the opposite page when you close your journal. While vinyl is highly durable and water-resistant, making it excellent for decorative cover stickers or divider tabs, it is impractical for functional tracker sheets. For a minimalist aesthetic, transparent matte sticker paper is a popular alternative, allowing the underlying dot grid of your journal to show through for a seamless, printed-on-the-page look.
Cutting Styles
Understanding the functional difference between kiss-cut and die-cut formats will help you design more efficient layouts. Kiss-cutting slices only through the top sticker layer while leaving the backing sheet completely intact. This is the ultimate format for bullet journaling because it allows you to group a themed collection of icons, weekly headers, habit trackers, or decorative borders on a single, easy-to-store sheet. It keeps your sticker collection organized and prevents small decorative elements from getting lost.
Die-cutting, on the other hand, cuts completely through both the sticker material and the backing paper, resulting in individual, loose stickers. This style is highly popular for standalone designs, laptop decals, or large decorative pieces. For daily journaling, handling dozens of tiny, individual die-cut stickers can be tedious, and peeling the backing off small die-cut shapes often leads to bent corners or torn edges.
Sizing and Layout
Precision is key when designing stickers to fit standard bullet journal layouts. Most popular journals utilize a 5mm dot grid system. If you are creating functional stickers—such as weekly headers, habit trackers, daily time strips, or checkbox columns—design your dimensions in multiples of 5mm (for example, a habit tracker that is exactly 30mm wide to span six grid squares perfectly).
To maximize your budget, arrange your designs efficiently on standard sheet sizes like A4 or A3. Most local printing services in the Philippines charge by the sheet rather than by the individual sticker. By nesting your designs closely together—leaving just enough space for the cutting blade (usually 2mm to 3mm of clearance between elements)—you can fit dozens of functional icons on a single sheet, reducing your cost per sticker significantly.
Comparing Custom Sticker Suppliers in the Philippines
Evaluating the primary avenues for getting stickers printed will help you choose the right service type for your specific volume and quality needs.

Local Commercial Print Shops
Local commercial print shops, ranging from neighborhood print hubs in university belts to established printing houses in Makati, Quezon City, or Cebu, offer distinct advantages for high-volume or urgent projects. One of the greatest benefits of working with a local shop is direct communication. You can often visit the shop physically or coordinate closely via local messaging channels to discuss paper weights, adhesive strengths, and cutting tolerances.
Furthermore, local printers allow you to request physical paper samples or run a small test print before committing to a massive production run. This is invaluable because it lets you physically touch the paper and test your favorite pens on it. Shipping is also highly efficient; once printed, orders can be dispatched via local express couriers, reaching your doorstep in Metro Manila within hours of completion, rather than waiting days for national post.
However, commercial print shops are geared toward business clients, which means they often enforce higher Minimum Order Quantities (MOQs). You might be required to order a minimum of 10 to 20 A3 sheets, which can translate to hundreds of stickers—far more than a single bullet journaler needs for personal use. Additionally, their material selection is often limited to standard commercial vinyl or thick glossy paper, with fewer options for the ultra-thin, low-profile matte papers that planner enthusiasts prefer to avoid bulk in their notebooks.
Online Print-on-Demand and Marketplace Sellers
For individual hobbyists, independent creators, and small stationery brands, specialized online print-on-demand platforms and marketplace sellers represent a highly flexible alternative. Many independent print shops operating on local e-commerce platforms cater specifically to the journaling community. Because they understand the unique needs of planner enthusiasts, they frequently stock specialized materials like premium writable matte paper, kraft sticker paper, and transparent frosted sheets.
These sellers typically offer incredibly low MOQs, sometimes allowing you to order as few as one or two custom-designed A6 sheets for as low as ₱50 to ₱150. Many of these services feature simplified, automated upload tools on their websites or coordinate directly through online chat, allowing you to upload your digital designs or scanned hand-drawn doodles with ease. This democratizes custom sticker printing, making it accessible for personal creative projects without a massive upfront financial investment.
Despite these benefits, there are notable trade-offs to consider. Shipping times can be significantly longer, especially if the creator is located in a different province or handles orders on a pre-order basis, which can take anywhere from five days to two weeks to arrive. You also lose the ability to physically inspect the paper texture or run pen tests before the final product is delivered. This makes it critical to read customer reviews, look for user-submitted photos, and carefully review the digital layout proofs provided by the seller before authorizing the print run.
Preparing Your Artwork for Flawless Printing
Guiding your artwork through the technical requirements of design and formatting ensures a high-quality, professional result.
File Formats and Resolution
The quality of your printed stickers is directly determined by the quality of your digital artwork. To ensure crisp, sharp lines and vibrant colors, always design and export your files at a minimum resolution of 300 DPI (dots per inch) at the actual print size. Designing at standard web resolution (72 DPI) will result in pixelated, blurry, or fuzzy prints, especially on fine details like hand-lettered text or intricate floral doodles.
When saving your final files, print-ready PDFs or high-resolution PNGs with transparent backgrounds are the industry standards. If you are ordering kiss-cut sheets, a transparent PNG allows the printer’s cutting software to easily detect the boundaries of your designs. Avoid using standard compressed JPEGs, as the compression artifacts (subtle pixelation around the edges of your artwork) can confuse optical cutting sensors, leading to jagged or misaligned cuts.
Color Profiles
One of the most common disappointments in custom printing stems from the difference between digital screens and physical ink. Digital screens display colors using the RGB (Red, Green, Blue) color model, which relies on light to create bright, highly saturated, and neon hues. In contrast, physical printers use the CMYK (Cyan, Magenta, Yellow, Key/Black) color model, which relies on physical ink pigments reflecting light.
Because the CMYK color spectrum is narrower than RGB, highly saturated digital colors—such as neon pinks, electric blues, and bright highlighters—cannot be perfectly reproduced on paper. They will often print out looking slightly muted, darker, or more pastel than they appeared on your screen. To prevent surprises, set your design software (such as Canva, Procreate, or Adobe Illustrator) to the CMYK color space before you begin drawing, or manually adjust your expectations for the physical output.
Bleed Areas and Cut Lines
Physical cutting machines, whether commercial flatbed cutters or desktop cutting plotters, have a tiny margin of error (usually around 1mm to 2mm). If your design is cut exactly on the border of your artwork, a microscopic shift in the blade can result in an unsightly white sliver on one side of your sticker, or it can clip off a portion of your design.
To prevent this, always incorporate a “bleed area” and clearly defined cut lines. A bleed is an extension of your background color or design elements 2mm to 3mm beyond the intended cut line. If the blade shifts slightly, it still cuts within your background color, ensuring a flawless edge. Additionally, if you want a classic white border around your sticker designs (a highly popular style for bullet journaling), add a clean, solid white offset path around your illustrations in your design program. This gives the cutting machine a clear, safe boundary to follow, ensuring your final stickers look polished and professional.
Evaluating and Testing Your First Sticker Order
Once your custom stickers arrive, it is essential to conduct a series of objective tests to evaluate their quality before placing larger orders.
Adhesion Test
Begin with an adhesion test inside your specific journal. Apply a sample sticker to a non-essential page (such as a test page or back cover) and press it down firmly. Let it sit for a few minutes, then attempt to gently peel it back up.
A high-quality planner sticker should adhere smoothly without curling at the corners. If you are using “repositionable” or “removable” sticker paper, it should lift cleanly from the page without tearing the underlying paper fibers or leaving a sticky, tacky residue behind. If it is permanent paper, it should bond securely, but it should not cause the journal page to warp, buckle, or ripple over time due to adhesive tension.
Ink and Paper Interaction
The ultimate utility of a bullet journal sticker often depends on how well it interacts with your writing instruments. Dedicate a small corner of your sticker sheet to an ink compatibility test. Write on the sticker using your daily-use pens, including gel pens, water-based brush pens, pigment liners, and fountain pens.
Observe how the ink behaves: Does it bead up and pool on the surface, or does it absorb smoothly? Note the drying speed by lightly running your finger over the ink after five seconds, thirty seconds, and one minute. If the ink smears easily even after a minute, the paper lacks the necessary absorption for quick, on-the-go journaling. Additionally, check if highly saturated brush markers bleed through the sticker paper and transfer onto the journal page beneath, which can ruin subsequent layouts.
Cutting Precision
Carefully inspect the physical cuts on your sticker sheet. For kiss-cut sheets, peel off several stickers to verify that the blade cut cleanly through the adhesive layer without slicing into the backing paper. If the backing paper is scored or cut through, the sheet will lose its structural integrity, making it difficult to store and handle.
Conversely, if the cut is too shallow, the stickers will resist peeling, often tearing at the edges or pulling up the backing paper with them. Check the alignment of the cuts relative to your artwork. If the white border is uneven—for instance, very wide on the left and non-existent on the right—the printer’s registration sensors were misaligned, which is a valid quality issue to address with the supplier.
Supplier Feedback
If you encounter any issues during your tests, approach your supplier with constructive, specific feedback. Printers appreciate clear, objective details rather than vague complaints. Instead of saying “the stickers are bad,” specify the exact issue: “The kiss-cut is too deep and has cut through the backing paper on sheet two,” or “The matte paper is smudging water-based gel ink even after two minutes of drying time.”
Provide clear, well-lit photos or a short video demonstrating the problem. Most reputable local print shops and independent marketplace creators in the Philippines value customer satisfaction and will offer to adjust their machine settings, suggest alternative materials, or even reprint your order if the error was on their end. Establishing this clear line of communication ensures that your future sticker batches are perfectly tailored to your bullet journaling workflow.
Frequently Asked Questions (FAQ)
What is the typical minimum order quantity (MOQ) for custom stickers?
Minimum order quantities depend heavily on the type of print provider you choose. Local commercial print shops in the Philippines typically require a minimum order of 5 to 10 A3 sheets, which can yield hundreds of individual stickers, making them ideal for bulk projects or small businesses. In contrast, independent creators and specialized print-on-demand sellers on local e-commerce platforms often have very low or even zero MOQs, allowing you to order a single custom A6 or A5 sticker sheet for personal use, usually priced between ₱50 and ₱150 per sheet.
Can I write on vinyl stickers with standard pens?
Generally, standard gel pens, ballpoint pens, and water-based markers will smear, bead up, or rub off on glossy or matte vinyl stickers because vinyl is non-porous and cannot absorb liquid inks. If you want to write on vinyl stickers, you must use specialized permanent markers, oil-based ballpoint pens, or industrial pigment liners, and allow several minutes for the ink to dry completely. For standard bullet journaling where quick writing is essential, it is highly recommended to opt for uncoated matte paper stickers instead.
How do I protect my custom stickers from humidity in the Philippines?
The high tropical humidity in the Philippines can cause raw, uncoated paper stickers to absorb moisture from the air, leading to curling edges, color fading, or adhesive degradation over time. To protect your stickers, you can request a thin matte or satin laminate overlay from your printer, which seals the paper fibers from ambient moisture while maintaining a non-glossy appearance. Additionally, store your unused sticker sheets in airtight plastic sleeves or folders with a small packet of silica gel desiccant to absorb excess moisture and keep them perfectly flat.

Community discussion
Share your experience or ask a question. Comments are reviewed before publication.